
Have you ever encountered a clogged or faulty bathtub drain that’s giving you a hard time? Removing a bathtub drain may seem like a daunting task, but with the right tools and a little know-how, you can tackle this project yourself. In this article, we will guide you through the process of removing a bathtub drain step by step. Whether you’re a DIY enthusiast or a homeowner looking to save some money on plumbing repairs, this article will provide you with the knowledge and confidence to get the job done. So let’s dive in and learn how to remove a bathtub drain!
1. Gather the Required Tools and Materials
Before you begin, it’s essential to gather all the necessary tools and materials for the job. Here’s a list of items you’ll need:
- Adjustable pliers
- Screwdriver (flathead or Phillips, depending on the drain type)
- Drain removal tool (specific to your drain type)
- Plumbers putty or silicone sealant
- Clean cloth or rag
- Bucket or container
Having these tools readily available will make the process smoother and more efficient.
2. Prepare the Bathtub Area
To avoid any damage or scratches to your bathtub surface, it’s a good idea to place a cloth or rag over the drain area. This will provide a protective layer and prevent any small parts from falling into the drain. If you’re uncertain about the location of the drain in your bathtub, you can refer to a bathtub drain diagram for a clear understanding of its positioning. This small step can go a long way in maintaining your bathtub’s pristine condition while minimizing potential issues.
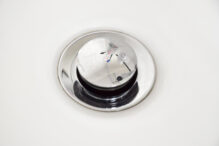
3. Remove the Bathtub Stopper or Strainer
The first step in removing a bathtub drain is to take out the stopper or strainer. Depending on the type of drain you have, this can be done in a few different ways:
- For Pop-up Stoppers: Pop-up stoppers are common in modern bathtubs. To remove them, locate the small lever or knob on the overflow cover plate (usually located near the faucet end of the tub). Lift the lever or twist the knob to release the stopper mechanism. You can then pull the stopper out from the drain.
- For Toe-touch Stoppers: Toe-touch stoppers are operated by pressing them with your toe. To remove this type of stopper, rotate it counterclockwise while pulling up gently. The stopper should unscrew and come out.
- For Strainer-Type Drains: Some older bathtubs have strainer-type drains that don’t feature a stopper mechanism. In this case, you can remove the strainer by inserting a screwdriver into one of the holes and turning it counterclockwise. The strainer should loosen, allowing you to lift it out.
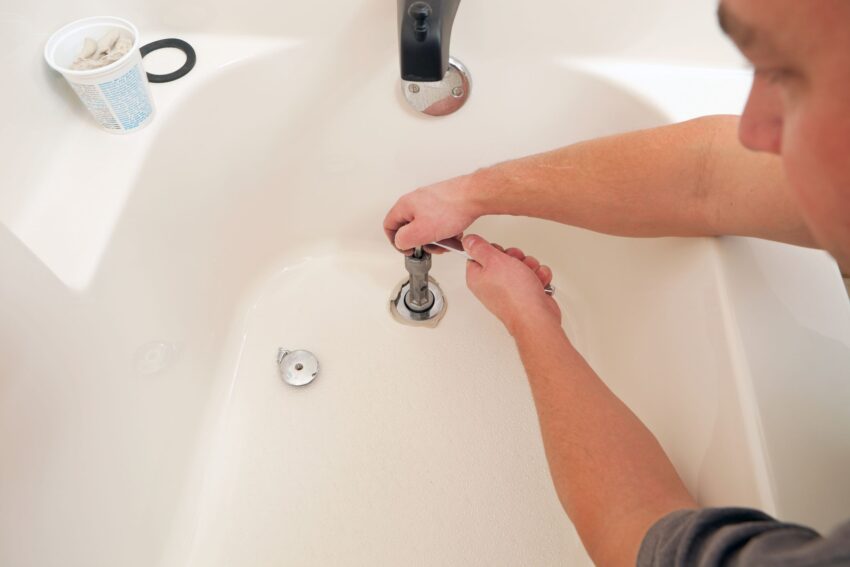
4. Loosen the Drain Flange
With the stopper or strainer out of the way, it’s time to loosen the drain flange. The drain flange is the visible part of the drain that sits on top of the bathtub surface. To loosen it, you’ll need to use either adjustable pliers or a drain removal tool specifically designed for your drain type.
- Using Adjustable Pliers: If you’re using pliers, place the tool’s jaws around the drain flange and tighten them securely. Apply firm, steady pressure counterclockwise to loosen the flange. Be cautious not to apply too much force as it could damage the drain or surrounding area.
- Using a Drain Removal Tool: If you have a drain removal tool, follow the manufacturer’s instructions to attach it securely to the drain flange. Use the tool’s handle to rotate counterclockwise and loosen the flange. These tools are designed to provide a better grip and leverage for removing stubborn drains.
5. Lift and Remove the Drain
Once the drain flange is sufficiently loosened, you can lift it out of the bathtub drain. Use your fingers or pliers to carefully lift the flange straight up. Be gentle to avoid damaging the surrounding area or breaking any components.
6. Clean the Drain and Pipe
With the drain removed, take a moment to clean the drain flange and the exposed pipe. Use a brush or a clean cloth to remove any debris, hair, or residue that may have accumulated over time. Cleaning the drain will not only improve its performance but also ensure a smooth installation of a new drain if needed.
7. Inspect the Drain Components
While you have the drain removed, it’s a good idea to inspect the various components for any signs of wear or damage. Check the condition of the gasket or seal that sits between the drain flange and the bathtub surface. If it appears worn out or damaged, it’s recommended to replace it with a new one.
8. Install a New Drain (Optional)
If you’re planning to replace the old drain with a new one, now is the time to do it. Follow the manufacturer’s instructions to install the new drain, ensuring a proper seal and tight fit. Apply the plumber’s putty or silicone sealant around the drain flange to create a watertight seal.
9. Reassemble the Bathtub Drain
If you’re not replacing the drain, it’s time to reassemble the bathtub drain. Place the cleaned drain flange back into the drain hole and screw it in clockwise until it is securely in place. Use adjustable pliers or a drain removal tool to tighten the flange, ensuring a snug fit.
10. Test the Drain
Once the drain is reassembled, it’s important to test its functionality. Fill the bathtub with some water and let it drain. Observe if the water drains smoothly without any leaks or blockages. If you notice any issues, double-check the installation and make any necessary adjustments.
Conclusion
Removing a bathtub drain might seem like a complex task, but with the right tools and knowledge, it can be accomplished successfully. By following the step-by-step guide provided in this article, you can confidently remove and reinstall a bathtub drain, whether for maintenance, repair, or replacement. Remember to exercise caution, be patient, and take your time during the process to avoid any damage to the drain or surrounding area. With a little effort and know-how, you’ll be able to enjoy a properly functioning bathtub drain once again.
You may like to read When Are the Playoffs for Baseball?