A smelly refrigerator isn’t just unpleasant; it can taint your fresh food and make your kitchen feel uninviting. While a quick wipe-down with baking soda seems like the go-to solution, understanding the causes of fridge odors is key to maintaining a truly fresh-smelling appliance. This guide will empower you with knowledge and effective solutions to banish those stubborn refrigerator smells for good.Continue reading →
Marriage is a beautiful union of two souls, a sacred bond that requires careful preparation and consideration. Before embarking on this incredible journey, it’s essential to take the first step – a step that lays the foundation for a strong and lasting relationship. Based on recent studies and research findings, it is essential to consider certain factors before getting married. Research has shown that men who received professional education were less likely to transition into marriage, spending less time at home, which could impact marriage rates. This pivotal moment sets the tone for the entire marriage, and it’s crucial to approach it with wisdom, honesty, and an open heart.Continue reading →
We’ve all been there: the late-night grumbles that erupt just as you’re settling in for some well-deserved rest. For teenagers, especially, these hunger pangs can be particularly intense. Growth spurts, coupled with a naturally later sleep cycle, make late-night snacking a frequent occurrence. But fear not, fellow food adventurers! There’s a way to satisfy those cravings without sabotaging your sleep or health goals.Continue reading →
The logistics industry, responsible for transporting goods across vast distances, is a significant contributor to global emissions. However, a promising solution is emerging: electric vehicles (EVs). Electrifying delivery trucks and vans have the potential to revolutionize logistics, paving the way for a cleaner and more sustainable future.Continue reading →
TikTok, the short-form video platform, has indeed become a cultural phenomenon with a massive user base and significant impact on popular culture. According to a study analyzing TikTok users’ motives, four distinct profiles were identified based on their motivations for using the platform: overall low motives, overall medium motives, overall high motives, and escapist addiction and novelty motives profiles. Let’s delve into the reasons behind a potential ban, explore the current situation, and analyze the potential consequences.Continue reading →
Blueberries are one of the most popular and delicious fruits around. Their sweet, tangy flavor makes them an irreplaceable ingredient in muffins, pancakes, yogurt parfaits, and more. When buying blueberries, you’ll often see them sold by the pint. But how much does a pint of blueberries weigh? Let’s take a closer look.Continue reading →
A door frame is an essential part of any home. It provides structure and support for the door and allows it to function correctly. Over time, door frames can become loose or damaged from regular use and need repairs. Often, the easiest solution seems to be removing and replacing the entire frame. However, removing and replacing a door frame can be complicated, time-consuming, and expensive. Fortunately, there are several techniques for repairing a door frame without completely removing it. With some basic DIY skills and suitable materials, you can fix a loose or damaged door frame while leaving it in place.
Assessing the Damage
Before beginning repairs, you must thoroughly examine the door frame to identify potential issues. Look for any of the following problems:
Loose frame – If the frame feels loose when you push or pull on it, this is a sign it may need to be re-secured to the wall. Open frames can allow the door to sag and rub against the frame.
Split or cracked wood – Damage like this can compromise the frame’s integrity. Cracks and splits need to be repaired.
Rotting or water damage – Leaks, moisture, and rot can weaken wood door frames over time. Areas with rot will need to be removed and replaced.
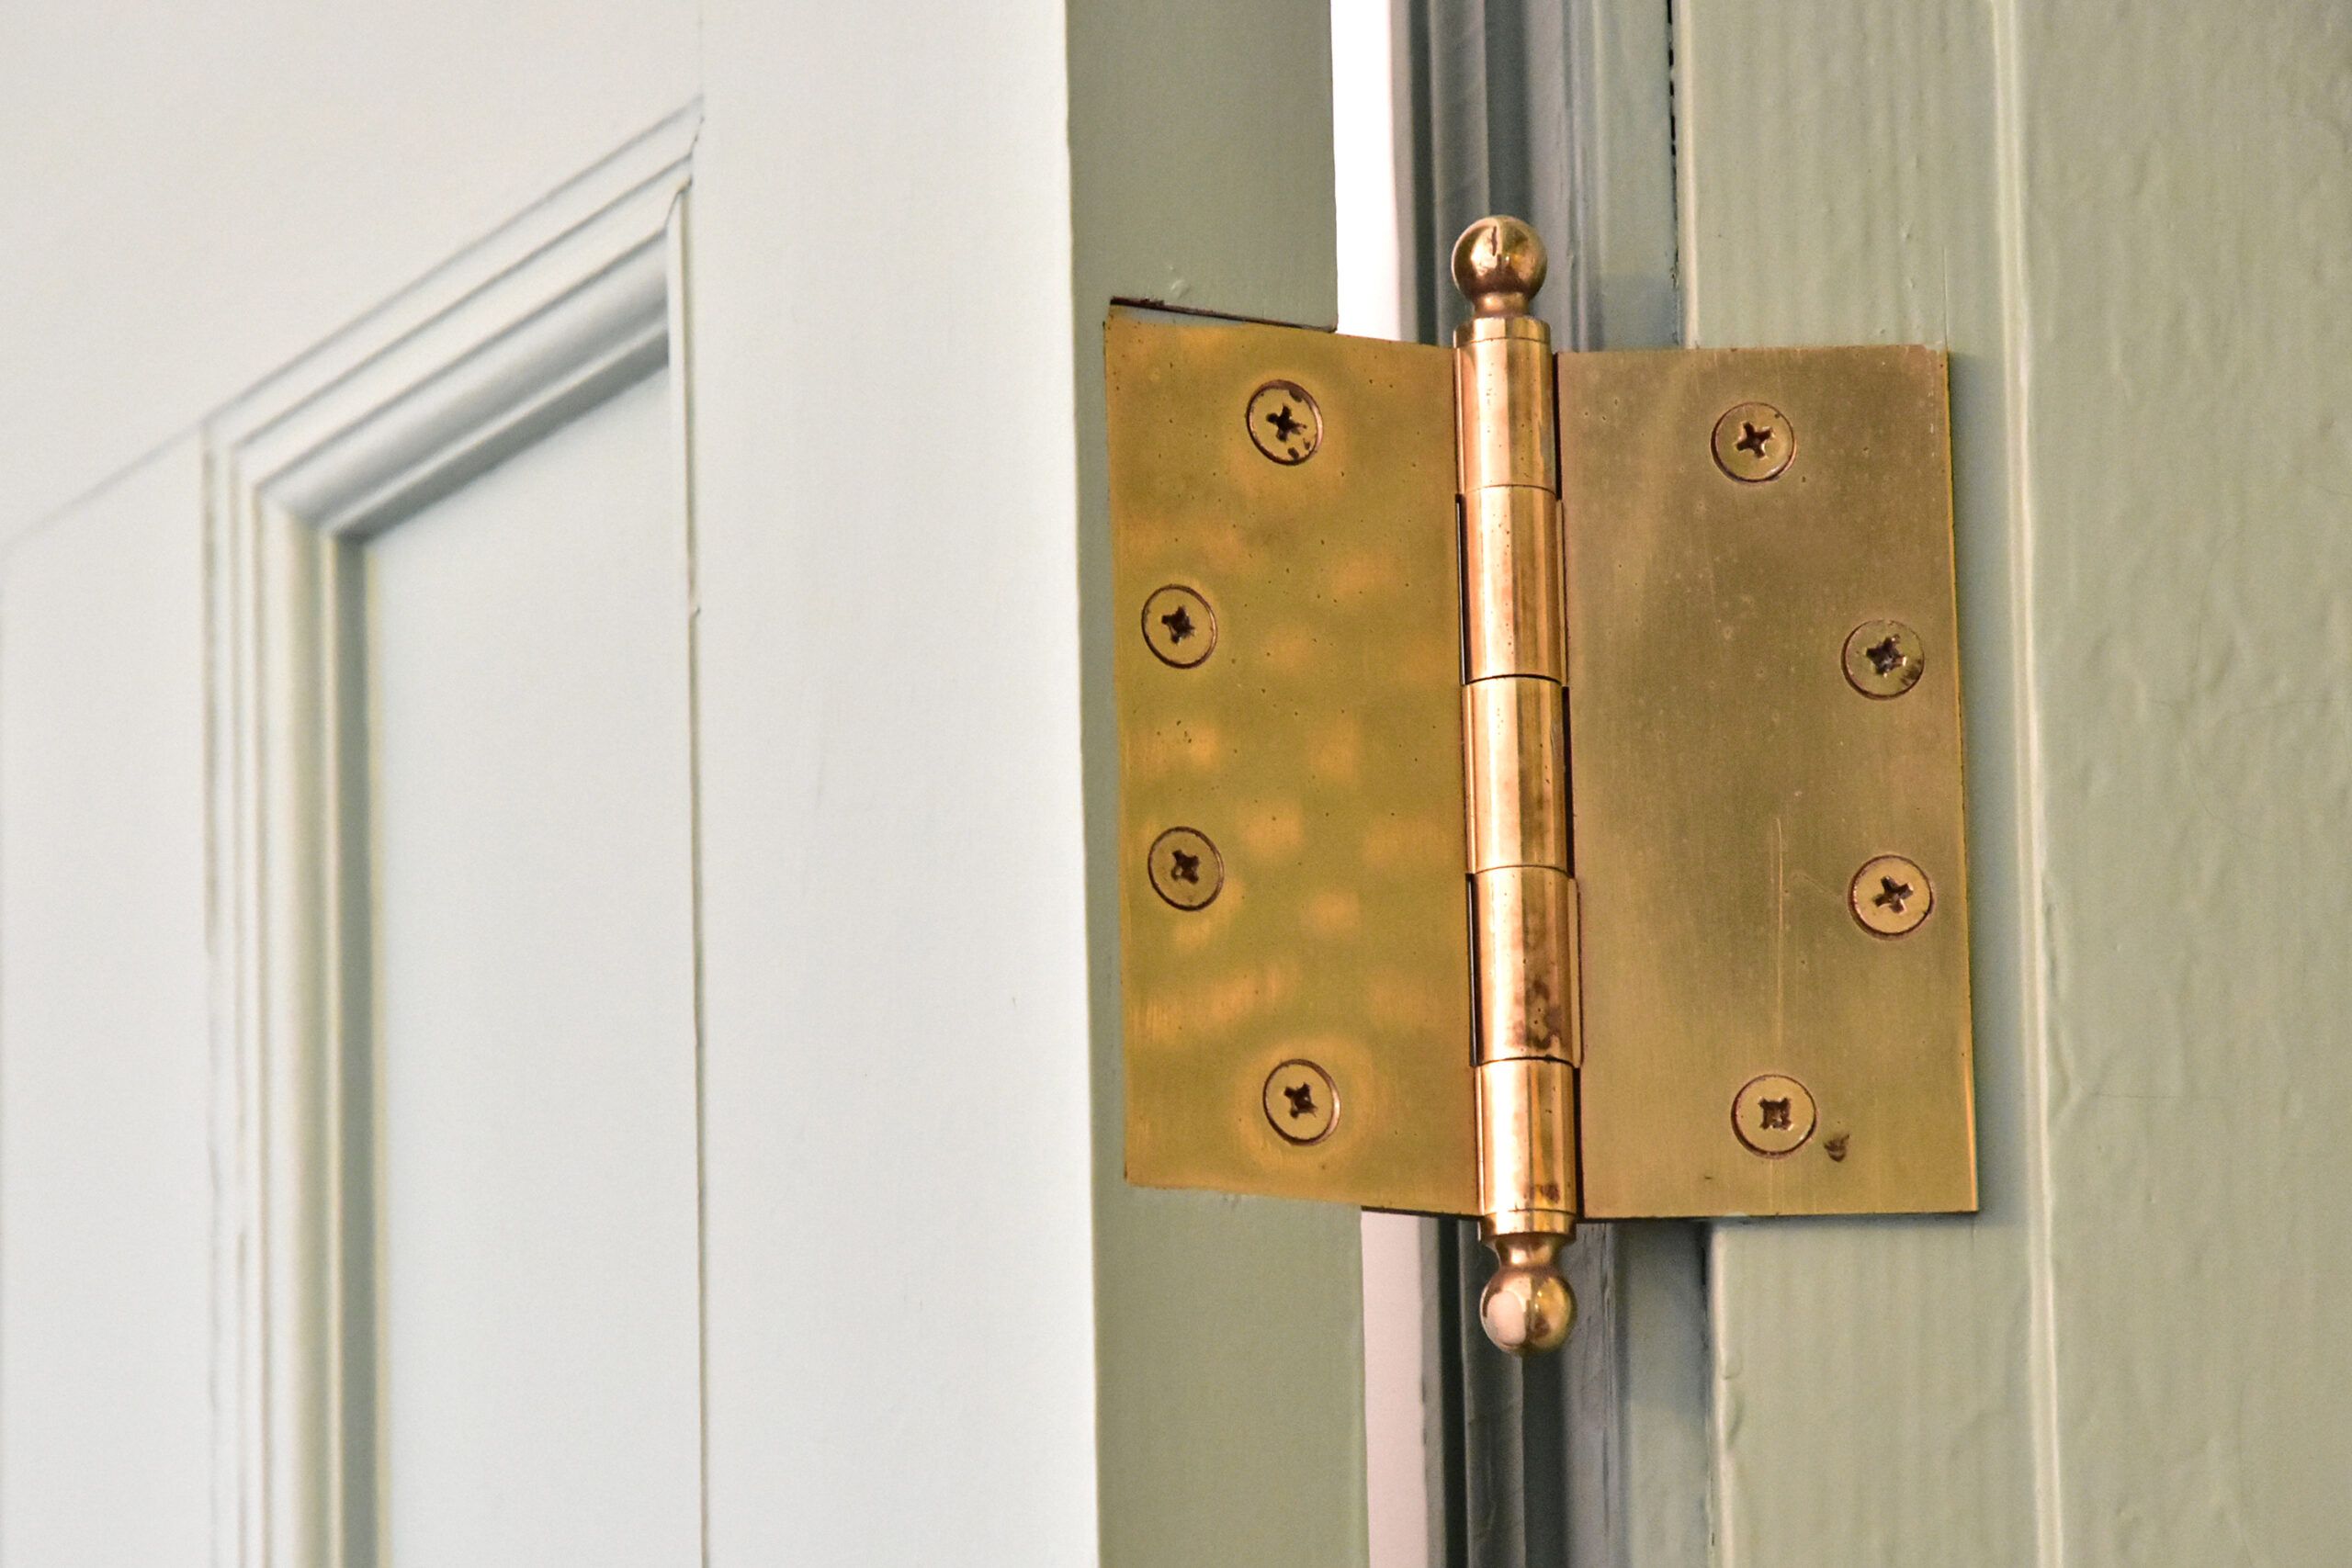
Missing or loose casing – The door casing (trim) helps hold the frame in place. The missing or loose casing will need to be reattached.
Damage to the wall – The frame may have pulled away from the wall, requiring repairs to the surrounding drywall or framing.
Inspect each side of the frame and the door casing for any issues. Take notes on all problem areas to know what needs to be addressed in your repair work. Discover thecrack above the door frame.
Gathering Necessary Materials
Once you’ve assessed the damage, make a list of all the materials you’ll need for repairs:
Wood glue – For bonding split wood and re-securing trim
Epoxy filler – Two-part wood filler can patch holes or cracks wider than 1⁄4 inch
Wood putty – For filling nail holes and small gaps after repairs
Sandpaper – For smoothing repaired areas
Screws or nails – For re-securing loose casing or frames
Wood shims – For leveling or stabilizing the frame
Paintable acrylic caulk – For filling gaps between the frame and the wall
Paint – Matching paint to touch up repaired areas
Wood boards – Replacement boards for sections with severe rotting or water damage
Tools – Hammers, pry bars, levels, drills, saws, etc.
Buy all the necessary supplies before starting work, so you have everything on hand. Safety gear like gloves, eye protection, and dust masks are also recommended.
Securing a Loose Door Frame
If the frame feels loose but is still reasonably level and intact, you likely just need to re-secure it directly to the wall framing. Here are the steps for this:
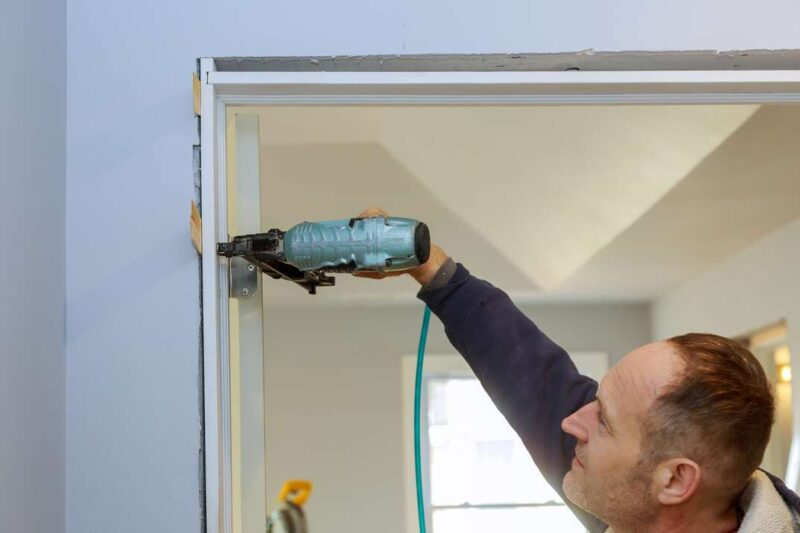
Remove the door – Take the door off the hinges and set it aside in a safe place. This gives you open access to the entire frame.
Inspect connection points – Look closely at where the frame meets the wall. You may see gaps, cracked caulking, or other signs it has pulled away.
Expose fasteners – Carefully pry off any trim or casing boards with a pry bar to access the original nails or screws attaching the frame.
Check for shims – Small shims or spacers may be between the frame and the rough opening. Leave these in place for now.
Drive new fasteners – Use longer screws to reinforce the frame’s connection to the wall framing—Predrill holes to avoid splitting the wood. Sink screws at least 2 inches into the framing at 12-16 inches intervals around the perimeter.
Re-secure trim – Replace any casing boards you removed and secure firmly with nails or screws. Fill holes with wood putty.
Caulk gaps – Seal any remaining cracks or gaps between the frame and the wall with paintable acrylic caulk for a tight seal. Smooth the caulk with a wet finger.
Rehang door – Once the frame is fully secured, rehang it on its hinges and test operation.
This technique tightens up a loose frame without completely removing and replacing it. The key is using long screws driven into the wall studs around the edges.
Filling Holes and Cracks
Over time, a door frame develops cracks, gouges, small holes, and other surface damage. These all need to be filled for both appearance and function:
Clean holes/cracks – Use a vacuum and rags to remove dirt and debris from damaged areas.
Widen cracks slightly – Use a screwdriver or utility knife to open the crack wider. This helps the filler penetrate deeper for better adhesion.
Apply wood glue – For minor cracks, squeeze wood glue down into the crack and wipe away excess with a damp rag. Let dry completely.
Fill larger holes – Use a two-part wood filler, pushing it down into wider holes or rotted areas. Follow product directions.
Sand smooth – Once the filler has fully hardened, flush the area and smooth it with 100-150 grit sandpaper.
Spot prime – Use a primer to coat any bare wood you’ve exposed from sanding repairs. This helps the paint bond.
Paint – Use a small paintbrush to touch up paint in the repaired areas. Apply two coats for the best coverage.
Correctly filled holes and cracks prevent further damage and restore the frame’s appearance. Be sure all areas are sanded smooth before painting.
Replacing Rotted or Water Damaged Sections
If parts of the door frame are badly rotted or water-damaged, you may need to replace sections entirely. This requires cutting out the damaged areas and installing new wood boards. Follow these steps:
Mark cuts – Examine the rotted sections and mark straight cut lines with a square 6 inches beyond the damage. These cut lines show you where to remove wood.
Carefully cut out bad areas – Use a jigsaw, circular saw, or handsaw to remove the marked sections. Cut slowly to avoid cracking the frame.
Measure replacement boards – Take precise measurements of the empty areas and cut replacement boards to size with a miter saw.
Predrill boards – Drill pilot holes in the new boards every 12-16 inches, where they’ll be attached to the frame.
Secure boards – Position the new boards over the cut areas. Use long wood screws driven into studs to secure them firmly into place.
Fill seams – Seal any gaps or seams between old and new wood with wood putty. Allow to completely dry.
Sand – Smooth everything flush once the filler has hardened. Spot prime and paint.
Cutting out and replacing specific sections keeps you from replacing the entire frame. Use pressure-treated wood for excellent rot resistance.
Re-securing Loose Door Casing
The door casing or trim is important in securing and stabilizing the frame. If casing boards become loose or fall off, the frame can shift and sag. Here’s how to properly reattach them:
Remove loose casing – Pry off any casing boards that are damaged or no longer attached using a pry bar.
Check behind boards – Examine the wall behind the casing area for damage. Repair any issues with drywall or framing.
Cut new boards – For badly damaged casing, cut new trim boards to size with mitered corners. Use the same type of wood as existing.
Predrill – Drill pilot holes in the new casing boards so screws can pass through into the wall framing.
Reinstall boards – Position boards over the frame and secure them with 2-inch screws driven into the studs. Sink screws every 12 inches.
Fill holes – Use wood putty on all screw or nail holes. Let dry thoroughly, then sand smooth.
Caulk gaps – Run a bead of paintable acrylic caulk down each joint before painting for a seamless look.
Ensure you properly secure any casing boards you reinstall to keep them firmly attached. Proper trim installation stabilizes the frame and limits future shifting.
Correcting a Sagging Frame
Over time, door frames can begin to sag downward in the middle from the door’s weight. This leads to alignment and operational issues. To fix a sagging frame:
Support door – Use a pry bar, jack, or shims to hold the door up temporarily and take the weight off the sagging frame.
Locate high points – Find the uppermost points where the frame meets the wall on each side. These will be your reference points.
Check level – Place a 4-foot level vertically against the high points of the frame to see how out of level the sagging area is.
Insert shims – Tap wooden shims into the gap between the bottom of the frame and the floor using a hammer. Insert shims until the frame is brought back to level.
Glue shims – Run a bead of construction adhesive along the shims and floor to glue them firmly, holding the frame level. Allow the adhesive to cure fully.
Replace trim – If you need to remove the base trim to insert shims, reinstall it now. Caulk and fill nail holes.
Solidify repair – For added reinforcement, drive several 3-inch screws through the frame sides into the shims and wall framing. Predrill holes first.
Patch screw holes – Fill screw holes with wood putty, let harden fully, then sand flush with the frame: spot prime and paint.
Test door – Carefully remove door supports and ensure the door operates smoothly without binding or sagging issues.
Adding shims builds up and supports a sagging frame from the bottom. Gluing them permanently stops additional downward movement. This straightens the frame without having to remove it altogether.
Filling Gaps Around Frame with Caulk
As a final step in repairing a door frame, filling any gaps around its perimeter with caulk improves appearance and seals out drafts.
Clean gaps – Use compressed air or a vacuum cleaner to remove any old caulk, dirt, or debris around the frame.
Widen gaps slightly – Lightly scrape a screwdriver around gaps to open them up just a bit for better caulk adhesion.
Force caulk into gaps – Use a paintable acrylic caulk and fill or seal any remaining gaps around the frame’s edges.
Smooth caulk – Run a wet finger along it to smooth out the bead and feather the edges before it dries.
Let cure – Allow the caulk to cure and dry according to manufacturer directions before painting entirely.
Paint – Use a small paintbrush to spot paint over caulk areas for a seamless look. Blend with wall paint.
Taking the time to caulk around the entire door frame neatly gives it a refined, polished look and prevents future damage.
FAQs
1. How long will door frame repairs take?
Most of the repairs outlined can be completed over 1-3 days. Securing loose frames takes just a few hours. Replacing sections or correcting sagging requires additional steps and materials that add time.
2. Can I use wood putty for all repairs?
Wood putty alone is not enough for most frame repairs. It is suitable for filling nail holes and very minor imperfections. Larger holes, cracks, and rotted wood need two-part wood fillers and replacement boards for best results.
3. What kind of screws should I use?
Opt for sturdy wood screws or deck screws at least 2 inches long. This allows you to anchor through the door frame into the wall studs or framing behind. Using the correct fasteners keeps the frame solidly in place.
4. How do I match new or repaired sections?
Take a sample of the existing frame to your local home improvement store. They can identify the wood type, match boards, and trim pieces to the same profile and dimensions. Prefinished pieces make matching easier.
5. Can I avoid entirely taking the door off?
It’s highly recommended to remove the door from the hinges first. This allows full access to adequate repairs. Attempting to work around the door makes the process far more complex and leads to inferior results.
Conclusion
Damaged door frames are an annoying but standard issue in most homes. Understanding techniques for repairing frames without complete removal and replacement saves homeowners time, money, and frustration. Assessing the damage, gathering suitable materials, and methodically fixing identified issues allow you to restore a frame to proper working order. Patience and attention to detail are essential. While it takes some effort, you can fix sagging, cracks, holes, and more in a door lock frame without the significant hassle of taking the entire unit out. Carefully following the above steps helps ensure long-lasting repairs that keep your doors functioning smoothly.
To find the right skateboard deck size, consider your height, shoe size, and personal preferences. Skateboard size directly impacts performance and comfort.
Skateboard deck size should match your body proportions for optimal riding experience. Selecting the correct deck size is crucial for both beginner and experienced skateboarders. Finding the right size ensures better stability, control, and maneuverability on the board. Size matters when it comes to choosing a skateboard deck that complements your style and skill level.Continue reading →
To wear women’s cycling shorts, put them on like regular shorts, ensuring a snug fit and proper alignment with your body. Next, adjust the padding to sit comfortably on your seat while cycling.
Cycling shorts are essential gear for any female cyclist, providing comfort and support during long rides. Whether you are a seasoned rider or a beginner, choosing the right fit and style can make all the difference in your performance and overall enjoyment.
By following a few simple steps, you can confidently wear women’s cycling shorts and optimize your riding experience.Continue reading →
Are you looking to enjoy the breeze without inviting unwanted pests into your home? Installing window screens is the solution! Whether you’re a homeowner or a renter, knowing how to install window screens can be a valuable skill. In this guide, we’ll walk you through the process step by step, ensuring you can enjoy fresh air while keeping bugs at bay.