

Starting your surfing journey is an exhilarating experience. Yet, while the open waves may beckon, finding the perfect balance on your board often proves to be a daunting challenge. Enter traction pads: the unsung heroes that transform slippery boards into reliable companions. For beginners, installing traction pads can seem costly and confusing. Luckily, DIY hacks can save you money while customizing your board for better performance.
Whether you’re aiming for better grip, a creative flair, or just a budget-friendly solution, we’ve got you covered. In this guide, we’ll walk you through the best DIY surfboard traction pad hacks, backed by expert advice, practical solutions, and real-life tips. Don’t forget to explore Coolsurfinggear for more handy surfing tools and tips!
Why Traction Pads Are Essential for New Surfers
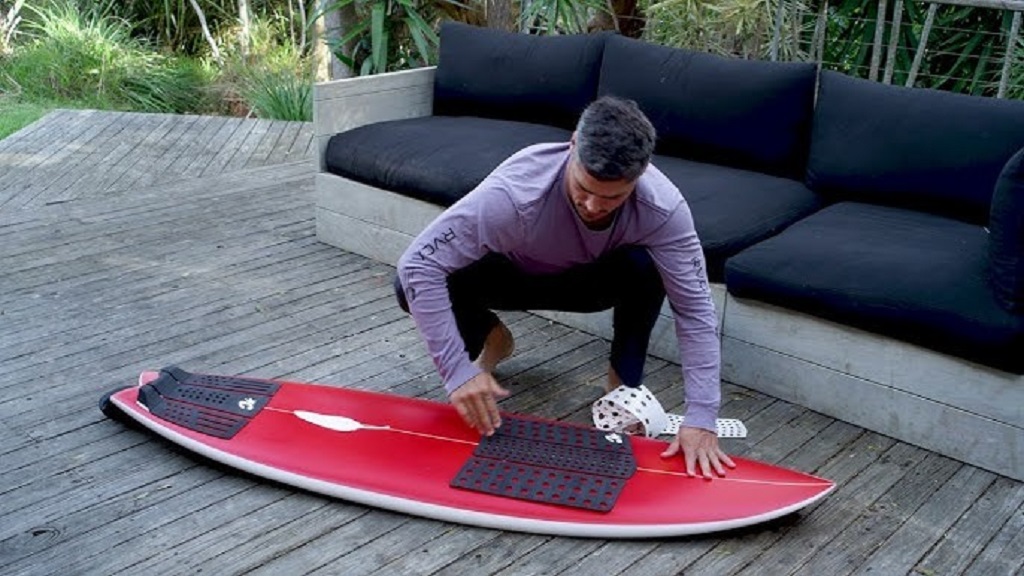
Traction pads provide a non-slip surface that enhances control, stability, and balance while surfing. Unlike wax, which can melt in hot temperatures and require constant reapplication, traction pads offer durability and reliability. New surfers often struggle with proper foot placement, and traction pads help guide their positioning on the board, making learning faster and safer.
A well-placed traction pad:
- Prevents your feet from slipping when carving waves.
- Reduces fatigue by improving grip, especially during longer rides.
- Protects your surfboard from damage caused by excessive wax scraping.
How the History of Surfboards Shaped Traction Pads
The history of surfboards reveals fascinating innovations that brought surfing to where it is today. From ancient Hawaiian wooden boards to the lightweight foam and fiberglass designs of the 20th century, surfing technology has come a long way. However, with the evolution of surfboards came the need for better grip solutions.
In the early days, surfers relied solely on wax for traction, often melting household candles to create grip. It wasn’t until the 1970s that modern traction pads were introduced. These pads revolutionized the sport, offering consistent performance and safety. Today, surfboard traction pads are made with high-quality EVA foam and are strategically textured to ensure maximum grip.
Choosing the Right DIY Materials for Traction Pads
Before diving into DIY hacks, let’s consider the materials. High-quality traction pads are made from EVA (Ethylene Vinyl Acetate) foam, known for its durability and shock absorption. For your DIY project, consider affordable alternatives that mimic these properties.
Here are some great materials to experiment with:
- Yoga Mats: Their soft, grippy texture makes them ideal for cutting and customizing.
- Non-Slip Shelf Liners: A cost-effective and durable option for adding traction.
- Neoprene Fabric: Lightweight and water-resistant, it provides excellent grip.
- Rubber Flooring Tiles: These can be cut into shapes and glued to your board for a firm grip.
Step-by-Step DIY Surfboard Traction Pad Hacks
Crafting your own traction pads can be as rewarding as riding your first wave. Follow these steps to create a professional-grade pad:
-
Plan Your Design
- Sketch the desired layout of your traction pad on paper. Most pads feature a central arch bar and a tail kick for added support.
- Mark the areas on your surfboard where traction is needed.
-
Gather Materials and Tools
- EVA foam, yoga mats, or other grippy materials
- High-quality waterproof adhesive (such as marine epoxy or Gorilla Glue)
- Sharp scissors or a utility knife
- Sandpaper to smooth edges
-
Cut and Shape Your Pad
- Using your template, cut the foam into the desired shapes. Create grooves or ridges for better grip.
- Be creative! You can design stripes, hexagons, or even a logo to personalize your board.
-
Prep Your Surfboard
- Clean the surface with rubbing alcohol to remove dirt and wax. This ensures better adhesion.
- Lightly sand the area where the pad will be placed for extra grip.
-
Attach the Pad
- Apply a thin layer of waterproof adhesive to the back of the pad.
- Press the pad firmly onto the board and smooth out any bubbles.
- Let it cure for 24 hours before hitting the waves.
Tips to Enhance Grip Without a Traction Pad
If you’re not ready to commit to a DIY project, there are simpler alternatives to improve your surfboard’s grip:
- Wax Alternatives: Use eco-friendly sticky sprays or traction powders to coat your board.
- Grip Tape: Similar to skateboard grip tape, this can be cut and applied to your surfboard.
- Surf Wax and Traction Combo: For extra hold, use a layer of basecoat wax under a textured grip pad.
Common Mistakes to Avoid in DIY Traction Pads
- Using Weak Adhesives: Ensure your adhesive is waterproof and long-lasting to avoid peeling.
- Overcomplicating Designs: Simple patterns often work best for beginners. Focus on functionality over aesthetics.
- Skipping Surface Prep: Failing to clean or sand your board can cause the pad to lift.
How to Maintain Your DIY Traction Pad
Maintaining your traction pad ensures it stays effective for years:
- Rinse your board with fresh water after every session to remove salt and sand.
- Avoid leaving your board in direct sunlight for extended periods, as heat can weaken adhesives.
- Replace sections of your pad as needed to maintain grip.
Why DIY Traction Pads are a Game-Changer for Beginners
DIY traction pads aren’t just cost-effective—they’re also an opportunity to learn about your board and customize it to suit your style. With the right materials and a little effort, you can achieve professional results without breaking the bank. Plus, creating your own pad fosters a deeper connection with your board, enhancing your confidence and performance on the waves.
Read More Also: Nailing Your Investor Pitch Deck: A Startup’s Guide to Funding
FAQs
What is the purpose of a surfboard traction pad?
A surfboard traction pad improves grip, stability, and control, making it easier to perform maneuvers and stay balanced on your board.
Can I use regular glue for my DIY traction pad?
No, it’s essential to use waterproof adhesive like marine epoxy to ensure the pad stays securely attached in water.
How long does a DIY traction pad last?
With proper maintenance and high-quality materials, a DIY traction pad can last several years.
Is a traction pad better than wax?
Both have their benefits, but traction pads are more durable and require less maintenance than wax.
Can I install a traction pad on a foam board?
Yes, just ensure the surface is clean and dry before attaching the pad.
What is the best material for DIY traction pads?
EVA foam, yoga mats, and neoprene fabric are all excellent choices for DIY traction pads.
Conclusion
DIY surfboard traction pads are the perfect solution for new surfers looking to save money, customize their boards, and improve their grip. From selecting the right materials to avoiding common mistakes, this guide has equipped you with everything you need to create a durable and functional traction pad.


