
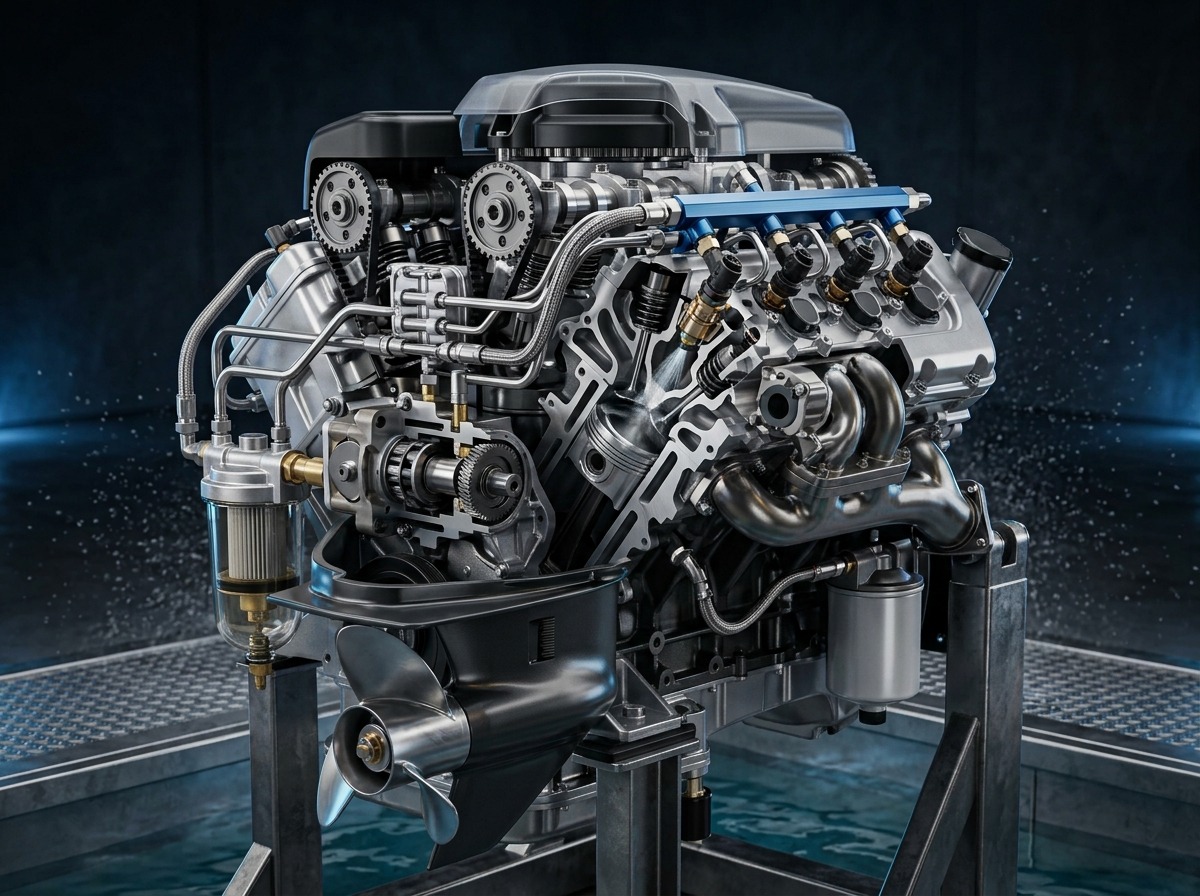
Marine fuel systems operate in one of the most demanding mechanical environments in existence. Between high humidity, continuous vibration, ethanol-blended fuels, and saltwater exposure, even minor component failures can lead to sudden loss of power, fuel starvation, or serious safety hazards on the water.
Ensuring reliability in a Mercury outboard engine requires a thorough understanding of fuel delivery paths—from the portable or onboard tank to the precision injection hardware inside the engine block.
Key Takeaways
- Check the Small Seals First: A degraded Mercury outboard fuel connector O-ring is the leading cause of air entering fuel lines, resulting in hard starts, lean misfires, and engine bogging under load.
- Prioritize Fuel Filtration: A high-quality Mercury outboard fuel filter water separator rated at 10 microns is critical to combat phase separation caused by modern E10 ethanol fuel blends.
- Maintain Tank Integrity: A failing Mercury outboard fuel tank gasket leads to fuel evaporation, phase contamination from ambient humidity, and dangerous vapor leaks in enclosed deck spaces.
- Service Vintage Connections Carefully: The Mercury 7.5 HP outboard fuel connector and similar vintage fittings feature specific pin-and-clip mechanisms that require direct-fit replacements rather than generic adaptors.
- Keep Injectors Clean: Maintaining Mercury outboard fuel injectors through regular flow cleaning prevents lean-condition cylinder damage and preserves factory horsepower across all RPM bands.
The Mercury Marine Fuel Circuit Architecture
Modern and vintage Mercury outboard fuel systems function on a closed-loop pressure or suction model. The assembly consists of five core stages:
A failure in any single segment degrades the performance of the entire system. Understanding how each part operates simplifies diagnostics and maintenance.
1. Quick-Disconnect Fittings and O-Ring Integrity
The fuel quick-disconnect connector links the fuel line to both the portable tank and the engine cowl inlet. While ruggedly constructed from chrome-plated brass, marine-grade stainless steel, or reinforced acetal plastic, the connection relies on an internal elastomeric seal.
The Role of the Mercury Outboard Fuel Connector O-Ring
Inside the female socket of the quick-disconnect coupler sits a small, high-density fluorocarbon (Viton) or nitrile (Buna-N) O-ring. When the male fuel prong inserts into the coupler, this O-ring compresses against the post to form an airtight, liquid-tight seal.
When this O-ring dries out, cracks, or flattens over time, two critical failure modes occur:
- Liquid Fuel Leaks: Under static pressure or when pumping the primer bulb, raw fuel drips past the fitting.
- Air Ingress (Vacuum Leaks): When the engine runs, the fuel pump pulls fuel from the tank. The suction pulls ambient air past the compromised O-ring into the fuel line rather than drawing liquid fuel.
Symptoms of a Compromised Connector O-Ring
- Engine starts, idles for 30–60 seconds, and abruptly dies.
- The fuel primer bulb collapses or refuses to stay firm under operational load.
- Visible air bubbles circulate in transparent pre-filter bowls under the cowl.
- Engine surges at mid-range RPM and stumbles during rapid throttle advancement.
Replacement Procedure
Replacing a damaged Mercury outboard fuel connector O-ring is an inexpensive repair that takes only a few minutes:
- Depress the central check-valve ball or pin inside the female coupler using a non-marring brass or plastic probe.
- Use an angled dental pick or O-ring puller to lift the old seal out of its internal groove. Avoid scratching the interior brass wall.
- Coat the replacement Viton O-ring with clean 2-stroke or 4-stroke marine engine oil to prevent friction tears during installation.
- Press the new O-ring into the opening, seating it firmly inside the retention groove.
- Connect the line to the male post and pump the primer bulb until firm, checking for leaks or wetness.
2. Legacy Engine Fittings: Mercury 7.5 HP Fuel Connectors
Classic two-stroke Mercury outboards, particularly vintage 7.5 HP, 9.8 HP, and 20 HP models built between the 1970s and late 1980s, use specialized fuel inlet hardware.
Connector Specifications for Small-Horsepower Mercury Motors
The Mercury 7.5 HP outboard fuel connector typically utilizes a vintage-style slide-locking mechanism or a bayonet-style twist lock rather than the modern squeeze-clip quick-connects found on four-stroke EFI platforms.
Using generic multi-fit fuel fittings on these smaller motors often causes air induction problems because the internal post clearances vary slightly from original Mercury manufacturing tolerances.
Troubleshooting Fuel Delivery on 7.5 HP Engines
- Pin Alignment: Ensure the male guide pins on the motor cowling bracket have not bent. Misaligned pins prevent the female fitting from seating deeply enough to open the spring-loaded internal check valve.
- Hose Sizing: Match the barb diameter on the connector to the fuel line. Standard 7.5 HP fuel runs use a 5/16-inch (7.9 mm) inner-diameter hose. Installing a 3/8-inch hose over a 5/16-inch barb with a screw clamp creates micro-gaps around the perimeter that leak air under pump suction.
- Corrosion Management: Clean the vintage connector housing with electrical contact cleaner or light marine degreaser. Salt crust buildup along the locking slide prevents full mechanical latching.
3. Marine Fuel Tank Integrity and Gaskets
Fuel preservation starts inside the fuel cell. Whether your setup uses a portable 6.6-gallon red composite tank or an integrated aluminum belly tank, maintaining a sealed environment is critical to fuel quality.
The Function of the Mercury Outboard Fuel Tank Gasket
The Mercury outboard fuel tank gasket seals the interface between the fuel tank body and the cap, fuel gauge sending unit, or pickup assembly. It prevents fuel spills, vapor loss, and moisture entry.
Modern marine regulations (such as EPA and ABYC standards for low-permeation fuel systems) require fuel tanks to manage pressure cycles without venting raw hydrocarbons directly into the air. A faulty gasket disrupts this balance.
Risks Associated with Gasket Failure
- Phase Separation from Atmospheric Moisture: Ethanol (E10) fuel naturally absorbs ambient water. If the tank gasket fails, damp marine air gets pulled into the tank during evening cooling cycles. Once the ethanol absorbs roughly 0.5% water by volume, it chemically separates from the gasoline base, dropping to the bottom of the tank as an abrasive, non-combustible alcohol-water layer.
- Fuel Oxidation and Varnish: Air exposure accelerates fuel oxidation, breaking down volatile hydrocarbons into gum and varnish deposits that clog internal carburetor jets and fuel injector screens.
- Bilge Vapor Accumulation: In vessels with permanent tanks, a leaking fuel sender gasket allows volatile gasoline vapors to gather in the low bilge area, posing an explosion risk during starter motor engagement.
Selecting the Right Gasket Material
Standard automotive rubber deteriorates rapidly when exposed to modern oxygenated marine fuels. When replacing a Mercury outboard fuel tank gasket, always choose materials specifically rated for marine fuel contact:
| Gasket Material | Resistance to E10 Ethanol | Fuel Vapor Retention | Typical Marine Application |
| Fluorocarbon (Viton) | Outstanding | Exceptional | High-pressure sender units & modern tank caps |
| Nitrile / Buna-N | Good | Moderate to High | Standard portable tank pickups & fill caps |
| Neoprene | Fair | Low | Dust seals and splash guards only (Not for immersion) |
| Cork-Rubber Composite | Poor with Ethanol | Poor | Vintage fuel senders (Obsolete; replace immediately) |
4. Advanced Water Separation and Primary Filtration
Water contamination is the leading cause of marine engine failure. Outboard motors operate directly over water, meaning fuel systems are constantly exposed to condensation, spray, and humidity.
Anatomy of a Mercury Outboard Fuel Filter Water Separator
A spin-on Mercury outboard fuel filter water separator acts as the primary barrier between the fuel tank and the engine’s onboard low-pressure pump. These filters use resin-impregnated, hydrophobic pleated media to separate water while trapping solid debris.
- Centrifugal Flow Separation: Fuel enters the outer ring of the filter cartridge, spinning downward. Dense water droplets settle to the bottom of the collection bowl.
- Coalescing Filtration: Smaller suspended micro-droplets merge on the hydrophobic pleated fibers until they gain enough mass to drop out of the fuel stream.
- 10-Micron Particulate Capture: Fine rust, tank scale, and debris down to 10 microns ($0.01\text{ mm}$) get trapped in the outer media wall before they can reach the engine’s internal filters.
Maintenance and Inspection Intervals
- 50-Hour Inspection: Inspect the clear lower collection bowl for water accumulation, phase-separated haze, or rust particulate.
- 100-Hour / Annual Replacement: Unscrew the filter cartridge, apply a light coat of clean marine oil to the base gasket, spin the new canister on until it contacts the base, and torque it an additional $3/4$ to 1 full turn by hand.
- Pre-Filling Caution: Never pre-fill a marine water separator filter with un-filtered fuel poured directly from a can. Doing so bypasses the filter media and introduces raw debris straight into the high-pressure fuel pump. Install the unit dry and prime it using the inline hand bulb or electric primer system.
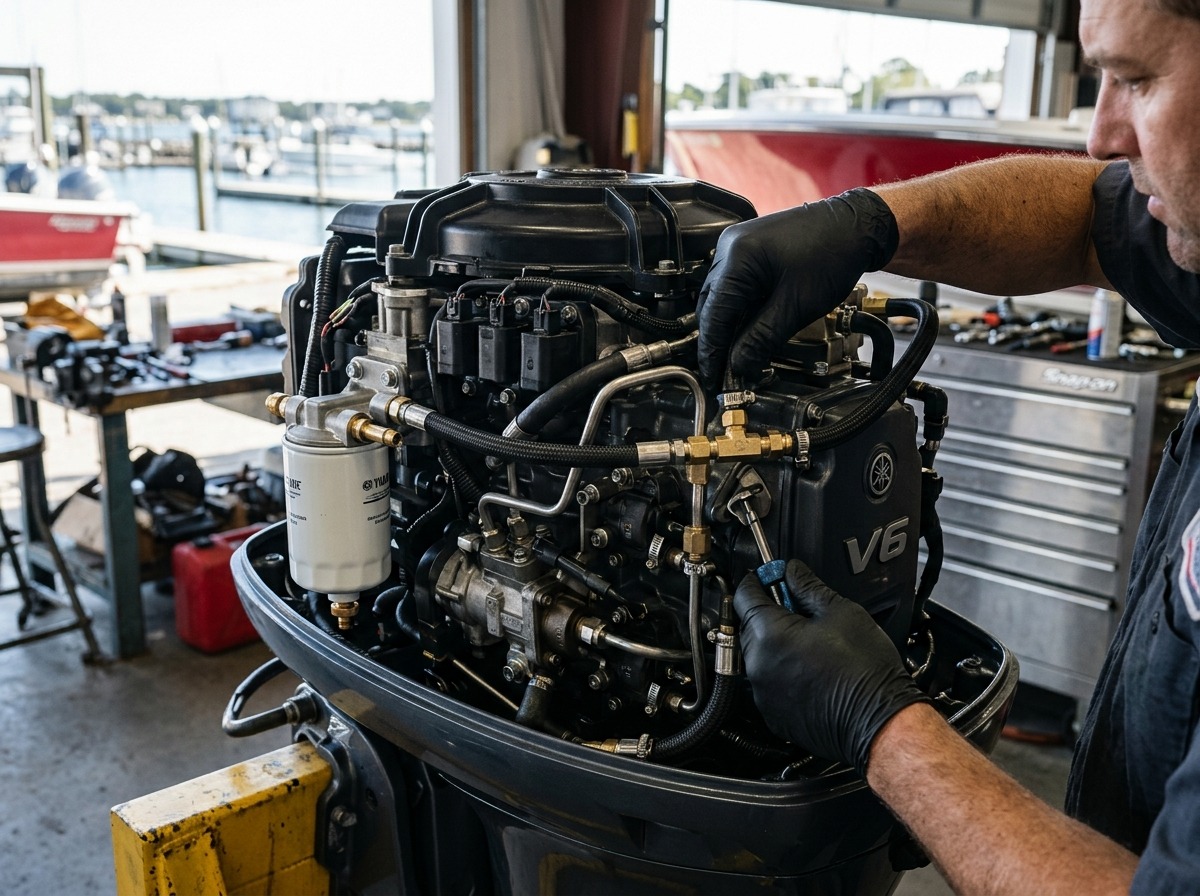
5. Electronic Fuel Injection: Maintenance and Diagnostics
Electronic Fuel Injection (EFI) and Direct Fuel Injection (DFI) systems in modern Mercury outboards—including FourStroke, Pro XS, and Verado platforms—operate under fuel rail pressures ranging from 35 to over 1,000 PSI.
At these pressures, the engine relies on Mercury outboard fuel injectors to deliver finely atomized fuel into the intake air stream or directly into the combustion chamber.
Anatomy and Tolerances of Mercury Outboard Fuel Injectors
A fuel injector consists of a high-speed electromagnetic solenoid coil, a stainless-steel internal return spring, an integrated micro-filter basket, and a precision-ground pintle or director plate with laser-drilled micro-orifices.
Because these components operate with micro-second actuation speeds, even microscopic deposits can degrade their performance.
Diagnostic Symptoms of Injector Issues
- Cylinder-Specific Lean Run: A partially restricted injector leans out fuel delivery to a single cylinder. This raises localized combustion temperatures, which can melt spark plug ground electrodes or scuff piston skirts under heavy throttle.
- Fuel Dilution in Crankcase Oil (“Making Oil”): A leaking or mechanically stuck-open injector allows raw fuel to wash down the cylinder walls, strip lubricating oil, and collect in the oil sump.
- Rough Idle and Drop-Cylinder Misfires: Uneven fuel delivery makes the engine shake at low idle speeds ($550–750\text{ RPM}$) and causes hesitation when getting on plane.
Testing and Servicing Fuel Injectors
- Resistance (Ohmic) Verification: Disconnect the engine wiring harness from the injector terminal. Measure resistance across the injector pins with a digital multimeter set to Ohms ($\Omega$). Standard Mercury high-impedance injectors typically measure between $12.0\text{ and }14.5\ \Omega$ at 20°C (68°F). An open circuit ($\infty$) or low reading indicates an internal coil short, requiring replacement.
- Ultrasonic Bath Restoration: Run contaminated injectors through an ultrasonic cleaner with a specialized solvent while cycling the solenoid electronically. This loosens and clears stubborn gum deposits from the internal pintle assembly.
- Flow Testing & Dynamic Balancing: After cleaning, test the injectors on a calibrated bench flow rack. Replace any unit whose total delivered volume differs by more than $3\%$ across the set.
Complete Mercury Outboard Fuel System Troubleshooting Matrix
When fuel delivery issues occur on the water, use this troubleshooting matrix to isolate the root cause:
| Symptom / Fault | Suspected Component | Primary Diagnostic Test | Corrective Action |
| Engine dies 30s after start; bulb is flat | Fuel Tank Gasket / Cap Vent | Check if the manual vent screw is opened; inspect the pickup seal. | Clean or replace the tank vent assembly; replace the tank cap gasket. |
| Air visible in pre-filter; engine surges | Fuel Connector O-Ring | Inspect the female quick-disconnect socket using a bright light. | Pull the damaged O-ring with a dental pick and install a Viton seal. |
| Bogging on 7.5 HP at wide-open throttle | 7.5 HP Fuel Connector | Wiggle the connection while running; check if the engine RPM changes. | Replace the worn slide-clip connector; verify 5/16″ hose size. |
| Hard starts; water present in fuel sample | Filter Water Separator | Drain the base collection bowl into a clear glass jar; look for separation. | Drain the bowl completely; spin on a new 10-micron filter element. |
| Misfire on Cylinder 3; plug tip is white | Fuel Injector | Test injector electrical resistance ($\Omega$); perform an injector drop test. | Ultrasonically clean the injector; replace internal micro-filter baskets. |
| Fuel smell in bilge; wetness at sender | Tank Sender Gasket | Pressurize the tank slightly; spray soapy water over the flange. | Replace the old cork or rubber seal with an ethanol-safe Viton gasket. |
Preventative Seasonal Maintenance and Winterization
Proactive care helps avoid costly fuel system repairs and ensures dependable performance every season.
Off-Season Storage Protocols
- Stabilize Fuel Before Storage: Add a high-grade marine fuel treatment containing antioxidant stabilizers and corrosion inhibitors to the tank. Fill the tank to approximately $95\%$ capacity to minimize air space and reduce condensation while leaving room for thermal expansion.
- Run Stabilizer Through the System: Run the engine on flush muffs or in a test tank for 10 to 15 minutes. This ensures treated fuel fills the fuel lines, Vapor Separation Tank (VST), lift pumps, and injectors.
- Lubricate Disconnect Seals: Disconnect fuel lines at the motor and tank. Coat the quick-disconnect posts and internal O-rings with a light film of pure dielectric silicone grease to keep the elastomeric seals soft and prevent cracking over the winter.
- Service the Vapor Separation Tank (VST): On EFI models with a manual VST drain screw, drain the fuel reservoir at the end of the season to prevent varnish from settling on the high-pressure fuel pump intake screen.
Frequently Asked Questions (FAQs)
What size O-ring does a standard Mercury outboard fuel line connector use?
Most modern Mercury quick-connect fuel couplers use an internal O-ring with an inside diameter of approximately 1/4-inch to 5/16-inch and an outer diameter of 7/16-inch, depending on the connector series. Always use genuine OEM-spec Viton (FKM) replacements. Standard hardware-store Buna-N O-rings degrade quickly when exposed to modern ethanol-blended marine fuels.
Can I run automotive fuel injectors in my Mercury outboard?
No. While some Mercury outboards use injector bodies similar to automotive parts, marine fuel injectors are calibrated with specific flow rates, spray patterns, and impedance levels tailored to two-stroke and four-stroke outboard combustion dynamics. Marine injectors also use corrosion-resistant internal stainless steel springs and coatings designed to withstand damp, saline operating environments.
How often should I replace the Mercury outboard fuel filter water separator?
Replace your primary 10-micron fuel filter water separator element every 100 engine operating hours or at least once per season, whichever comes first. If you regularly use E10 ethanol fuel or operate in humid coastal environments, inspect the bowl for water accumulation every 50 hours and service it as needed.
Why is my Mercury 7.5 HP fuel connector leaking even after replacing the hose?
Fuel leaks on vintage Mercury 7.5 HP engines usually stem from worn guide pins on the motor bracket or a deteriorated check-valve seal inside the connector body. If the male prong is grooved, pitted from corrosion, or misaligned, the internal seal cannot seat properly against the mating surface. In these cases, replace both the male bracket fitting and the female line connector as a set.
How do I know if my fuel tank gasket is failing?
Common indicators of a bad tank gasket include:
- Fuel smells around the tank storage compartment or under the deck
- Fuel residue or dirt rings collecting around the base of the tank sending unit or cap
- The engine drawing air bubbles into the fuel line when running
- Water or debris appearing in your water separator bowl after heavy rain or washing the deck
Final Verification Checklist
- Connectors clicked firmly into place with zero lateral wobble
- Female coupler O-rings free of nicks, flat spots, and dry rot
- Fuel tank vent clear and gasket seated flat without over-torqueing
- Filter water separator canister tightened securely and free of leaks
- Primer bulb pumps up firm and maintains pressure
- Injector electrical connectors snapped tightly into harness clips


