

Winter storage can be tough on your RV if you don’t take proper precautions. Cold temperatures, moisture, and pests can cause serious damage to your vehicle’s underbelly. Therefore, understanding the best sealing methods is essential for protecting your investment. At Gett In Cool, we help RV owners maintain their vehicles through all seasons with practical advice and tips.
The underbelly of your RV is particularly vulnerable during winter months. Water can freeze and expand in small cracks, causing significant structural damage. Additionally, rodents often seek warm shelter in these spaces during cold weather. Proper sealing prevents both moisture intrusion and unwanted guests from damaging your RV’s plumbing, electrical systems, and insulation.
Before you begin sealing your RV’s underbelly, it’s important to understand how to prepare an RV for storage properly. This preparation includes cleaning, inspecting, and addressing any existing damage before applying sealants. However, the sealing process itself requires specific materials and techniques to ensure maximum protection throughout the winter season.
Inspecting Your RV Underbelly
Start by thoroughly inspecting the entire underbelly area. Look for any existing cracks, holes, or damaged sections in the protective covering. Use a flashlight to examine every corner and seam carefully. Furthermore, check for signs of previous water damage, such as staining or soft spots in the material.
Pay special attention to areas where pipes, wires, or other components penetrate the underbelly. These spots are common entry points for both water and pests. Moreover, inspect the condition of any existing sealant or tape that may have deteriorated over time.
Cleaning and Preparing the Surface
Once you’ve completed your inspection, clean the underbelly thoroughly. Remove dirt, grease, and debris using a mild detergent and water solution. Allow the surface to dry completely before applying any sealants. This step is crucial because sealants won’t adhere properly to dirty or wet surfaces.
Next, remove any old, deteriorated sealant or tape. Use a scraper or putty knife to carefully strip away damaged material. Subsequently, sand rough edges to create a smooth surface for the new sealant to bond with effectively.
Choosing the Right Sealing Materials
Several effective materials are available for sealing RV underbellies. Each option has specific advantages depending on your needs and budget.
Rubber membrane is a popular choice for comprehensive underbelly protection. This material provides excellent waterproofing and flexibility. It moves with your RV’s frame during travel, preventing cracks from forming. Additionally, rubber membrane offers good insulation properties that help maintain interior temperatures.
Polyethylene sheeting offers another durable option. This material resists tearing and punctures better than some alternatives. It’s also relatively affordable and easy to install. However, it may require professional installation for best results.
Self-adhesive seam tape works well for smaller repairs and reinforcing vulnerable areas. This tape is specifically designed for RV applications and provides strong adhesion in various weather conditions. Therefore, it’s ideal for sealing seams and edges around the underbelly perimeter.
Applying Underbelly Sealant
Begin sealing from one end of your RV and work systematically toward the other end. This approach ensures you don’t miss any sections. Use overlapping sections when applying membrane or sheeting materials to prevent gaps where moisture could enter.
For rubber membrane installation, start by cutting the material to size with a few extra inches on all sides. Apply adhesive according to the manufacturer’s instructions. Press the membrane firmly against the underbelly, working out any air bubbles as you go. Subsequently, trim excess material and seal all edges with appropriate tape or sealant.
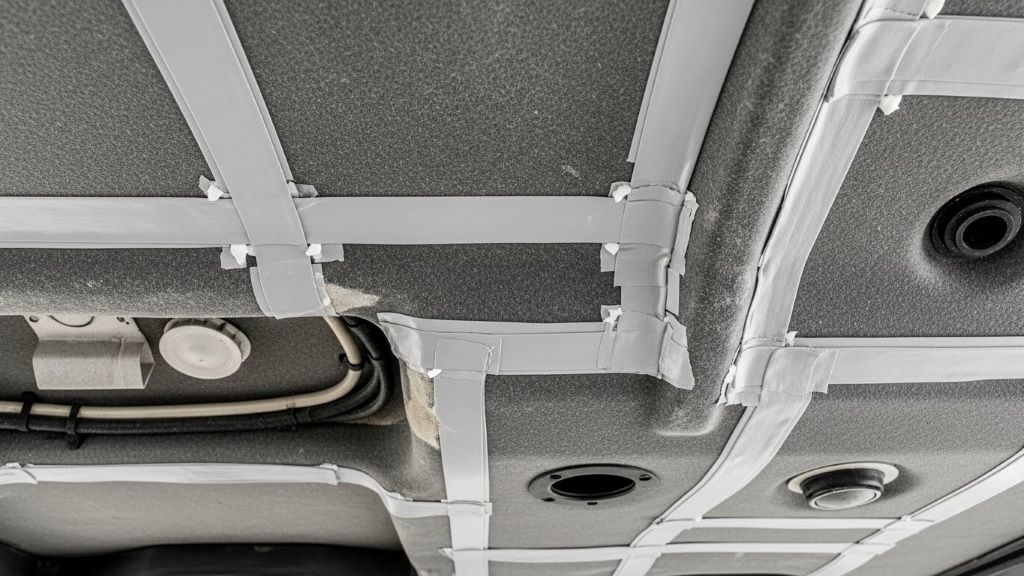
When using seam tape, ensure the surface is clean and dry before application. Press the tape firmly along all seams, overlapping corners by at least two inches. Additionally, apply extra pressure to corners and edges where separation is most likely to occur.
Sealing Penetration Points
Penetration points require special attention during the sealing process. These areas include spots where plumbing pipes, electrical conduits, and heating ducts pass through the underbelly. Use flexible sealants specifically designed for these applications.
Silicone-based sealants work well around pipes and wires because they remain flexible after curing. Apply sealant generously around each penetration point, ensuring complete coverage. Moreover, check that the sealant creates a continuous barrier without gaps or thin spots.
For larger openings, consider using expandable foam first to fill the space, then cover with sealant for a watertight seal. This combination provides both insulation and moisture protection.
Adding Extra Protection
Consider installing a protective barrier layer over your sealed underbelly. Heavy-duty plastic sheeting or specialized RV underbelly material provides an additional shield against road debris and moisture. According to the RV Industry Association, proper underbelly protection can extend your RV’s lifespan significantly.
Secure the protective layer using heavy-duty staples or screws with large washers. Space fasteners approximately 12 inches apart for secure attachment. Furthermore, ensure the material extends beyond the frame rails to direct water away from vulnerable areas.
Rodent Prevention Measures
While sealing protects against moisture, it also helps prevent rodent intrusion. However, take additional steps to discourage pests from attempting entry. Steel wool works effectively for stuffing small holes before sealing, as rodents cannot chew through it easily.
Consider using rodent-repellent products in your RV’s storage area. Natural deterrents like peppermint oil or commercial repellent pouches can discourage mice and rats from approaching your vehicle. Additionally, remove all food items from your RV before storage to eliminate attractions for pests.
Ventilation Considerations
While sealing is important, proper ventilation remains essential. Your RV needs airflow to prevent moisture buildup inside the living space. Therefore, ensure your sealing work doesn’t block necessary vents or air passages.
Leave roof vents slightly open or install vent covers that allow airflow while keeping precipitation out. This balance prevents condensation problems that can lead to mold and mildew growth during storage months.
Regular Inspection Schedule
Sealing your RV underbelly isn’t a one-time task. Plan to inspect your work several times during the winter storage period. Check for any new damage or areas where sealant may have failed. Consequently, address issues promptly before they become major problems.
Schedule inspections after heavy storms or extreme temperature fluctuations. These conditions can stress sealants and protective materials. Moreover, early detection of problems allows for easier repairs than waiting until spring.
Professional vs DIY Sealing
Many RV owners successfully seal their underbellies themselves. However, extensive damage or complex underbelly configurations may require professional attention. Consider your skill level and the scope of work needed before deciding.
Professional services typically cost between $500 and $2000, depending on your RV’s size and condition. Meanwhile, DIY materials might cost $100 to $400. Nevertheless, improper DIY sealing could lead to costly damage that exceeds professional service costs.
Conclusion
Protecting your RV’s underbelly before winter storage is essential for maintaining your vehicle’s condition and value. Proper sealing prevents moisture damage, pest intrusion, and costly repairs. Therefore, invest time in thorough inspection, quality materials, and careful application techniques.
Remember to balance protection with necessary ventilation to prevent interior moisture problems. Regular inspections throughout the storage period help catch issues early. Whether you choose professional services or tackle the project yourself, proper underbelly sealing ensures your RV emerges from winter storage ready for new adventures.
Frequently Asked Questions
What is the best material for sealing an RV underbelly?
Rubber membrane provides excellent protection for most RV underbellies. It offers superior waterproofing, flexibility, and durability. However, polyethylene sheeting works well for budget-conscious owners, while seam tape effectively handles smaller repairs and reinforcement projects.
How often should I reseal my RV underbelly?
Inspect your RV underbelly sealing annually before winter storage. Complete resealing typically becomes necessary every 3-5 years, depending on usage and storage conditions. However, address any visible damage or deterioration immediately, regardless of the timeline.
Can I seal my RV underbelly in cold weather?
Most sealants require temperatures above 50°F for proper application and curing. Therefore, complete underbelly sealing projects during fall before temperatures drop significantly. Cold weather prevents proper adhesion and can compromise seal effectiveness.
How do I prevent rodents from entering my sealed RV underbelly?
Combine physical barriers with deterrents for best results. Stuff steel wool in small holes before sealing, remove all food from your RV, and use peppermint oil or commercial rodent repellents around your storage area. Additionally, inspect regularly for signs of attempted entry.
Should I hire a professional to seal my RV underbelly?
DIY sealing works well for small repairs and straightforward applications. However, consider professional help for extensive damage, complex underbelly configurations, or if you lack experience with RV maintenance. Professionals ensure proper technique and materials for long-lasting protection.
Related Topics:
Does Vicarious Liability Apply Without Driver Negligence? Here’s What the Law Says
Transform Your Living Space with Expert Light Fixture Installation


