
Calibrating a broadcast spreader for clover seed ensures even distribution, promotes healthy growth, and prevents over- or under-seeding your lawn. Clover, a low-maintenance, nitrogen-fixing plant, is a popular choice for eco-friendly lawns, but its small seeds require precise application. At Boyers Lawn Care, we understand the importance of proper equipment calibration to achieve a lush, sustainable clover lawn. This guide will walk you through the step-by-step process of calibrating your broadcast spreader, offering practical tips to maximize efficiency and accuracy.
Why Calibrate Your Broadcast Spreader?
Calibration is critical because clover seeds are tiny and lightweight, making them prone to uneven spreading if the equipment isn’t set correctly. An uncalibrated spreader can lead to patchy growth, wasted seed, or even lawn damage due to over-application. Moreover, proper calibration saves time and money by ensuring you use the right amount of seed. Before starting, familiarize yourself with safety measures, such as those outlined in ppe regulations grass cutting, to protect yourself while handling lawn equipment.
Understanding Your Broadcast Spreader
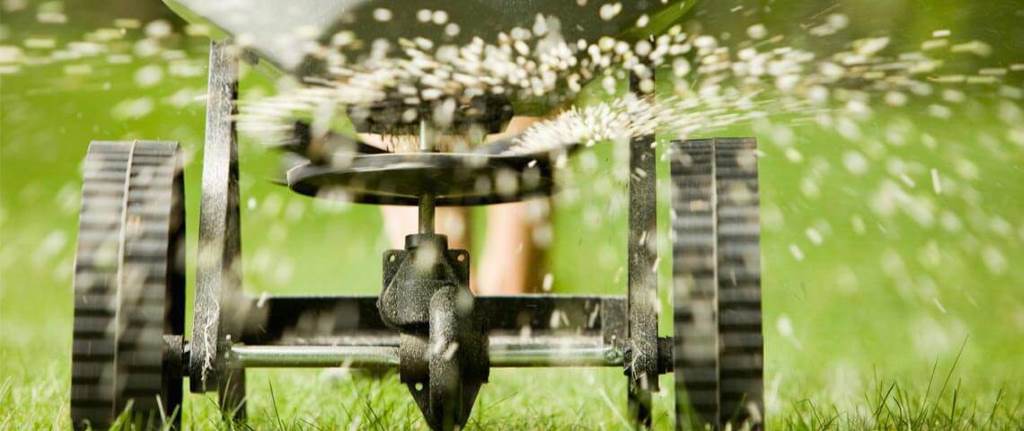
Broadcast spreaders, also known as rotary spreaders, distribute seeds in a wide arc, making them ideal for covering large areas. However, each spreader model has unique settings, so consult your owner’s manual for specific instructions. Most spreaders have an adjustable dial or lever to control the flow rate, which you’ll fine-tune during calibration. Additionally, clover seed requires a lower flow rate than grass seed due to its size, so precision is key.
Step-by-Step Guide to Calibrating Your Broadcast Spreader
Follow these steps to calibrate your broadcast spreader for clover seed, ensuring an even and efficient application.
Step 1: Gather Your Materials
Before calibrating, collect the necessary tools and materials:
- Broadcast spreader
- Clover seed
- Measuring tape
- Scale (kitchen or postal scale works well)
- Collection container (e.g., tarp, bucket, or tray)
- Calculator
- Owner’s manual for your spreader
- Marker or tape for measuring
Having everything ready streamlines the process and reduces interruptions.
Step 2: Check the Spreader Settings
Start by inspecting your spreader for any damage or clogs that could affect seed flow. Next, refer to the owner’s manual to locate the seed flow control dial. Most manufacturers provide a recommended setting for clover seed, often a low number (e.g., 1–3 on a 1–10 scale). If no specific setting is listed, start with the lowest setting and adjust as needed during calibration.
Step 3: Determine the Application Rate
Clover seed application rates vary depending on whether you’re overseeding an existing lawn or starting fresh. According to the University of Minnesota Extension, a typical rate for clover is 1–2 pounds per 1,000 square feet for overseeding and 2–4 pounds per 1,000 square feet for new lawns. Check the seed bag for the manufacturer’s recommended rate, as it may differ slightly.
To calculate the total seed needed, measure your lawn’s square footage (length × width). For example, a 5,000-square-foot lawn at 2 pounds per 1,000 square feet requires 10 pounds of clover seed. This calculation helps you estimate how much seed to load into the spreader.
Step 4: Set Up a Test Area
To calibrate accurately, create a test area to measure how much seed your spreader distributes. Mark a 100-square-foot area (e.g., 10 feet by 10 feet) using a measuring tape and markers. This size is manageable and provides reliable data for scaling up. Alternatively, if your spreader’s manual suggests a different test area size, follow that recommendation.
Step 5: Perform a Test Run
Fill the spreader with a small amount of clover seed (e.g., 1–2 pounds) to avoid waste. Set the spreader to the lowest recommended setting for clover seed. Walk at a steady pace over the test area, pushing the spreader as you would during actual seeding. Use a tarp or container to collect the dispensed seed for measurement. Weigh the collected seed using a scale and record the amount.
For example, if your target rate is 2 pounds per 1,000 square feet, you should collect 0.2 pounds (3.2 ounces) of seed for a 100-square-foot test area. If the collected amount is too high or low, adjust the spreader setting and repeat the test until you achieve the desired rate.
Step 6: Adjust and Repeat
Fine-tuning is often necessary, especially with clover’s small seeds. If too much seed is dispensed, lower the flow setting slightly. Conversely, if too little seed is released, increase the setting. Repeat the test run until the spreader consistently delivers the correct amount. Be patient, as small adjustments can make a significant difference.
Step 7: Account for Walking Speed and Overlap
Your walking speed affects seed distribution. Aim for a consistent pace, typically 3 miles per hour (a brisk walk). Additionally, broadcast spreaders create a wider spread pattern, so overlap each pass slightly to avoid gaps. Practice your technique in the test area to ensure even coverage.
Step 8: Calibrate for Your Entire Lawn
Once you’ve determined the correct setting, calculate the total seed needed for your lawn and fill the spreader accordingly. Spread the seed in parallel rows, overlapping slightly for uniformity. Monitor the spreader’s performance, as clogs or changes in terrain can affect output. If you notice inconsistencies, stop and recheck the settings.
Tips for Successful Clover Seeding
To maximize your calibration efforts and ensure a thriving clover lawn, consider these tips:
- Spread in Ideal Conditions: Seed on a calm day to prevent wind from scattering lightweight clover seeds. Early morning or late afternoon is best to avoid heat stress.
- Prepare the Soil: Loosen the soil with a rake or aerator before seeding to improve seed-to-soil contact. The Penn State Extension recommends aerating for better germination.
- Water Regularly: After seeding, keep the soil moist but not waterlogged to encourage germination, which typically takes 7–14 days.
- Clean the Spreader: After use, clean the spreader thoroughly to prevent clogs and ensure it’s ready for future use.
- Test Your Soil: Clover thrives in slightly acidic to neutral soil (pH 6.0–7.0). Test your soil and amend it if necessary before seeding.
Read Also:
Beginner’s Lawn Care Guide: NYC Steps to a Green Lawn
Best Companion Flowers for Natural Pest Control in a Cutting Garden
Common Mistakes to Avoid
Even with proper calibration, mistakes can hinder your results. Avoid these pitfalls:
- Skipping the Test Run: Guessing the spreader setting often leads to uneven application.
- Ignoring the Manual: Each spreader model is different, so always check the manufacturer’s guidelines.
- Overfilling the Spreader: Excess seed can clog the mechanism, causing inconsistent distribution.
- Inconsistent Walking Speed: Varying your pace can result in uneven seed application.
FAQs
Why is calibrating a broadcast spreader important for clover seed?
Calibrating ensures even seed distribution, preventing patchy growth and wasted seed. Clover’s small seeds require precise settings for optimal results.
What is the recommended clover seed application rate?
For overseeding, use 1–2 pounds per 1,000 square feet; for new lawns, use 2–4 pounds per 1,000 square feet, depending on the seed variety.
How do I know if my spreader is dispensing the right amount?
Perform a test run over a measured area (e.g., 100 square feet), collect the seed, and weigh it to match the target application rate.
Can I use the same spreader settings for grass and clover seed?
No, clover seeds are smaller and require lower flow settings than grass seeds. Always recalibrate for each seed type.
How often should I calibrate my spreader?
Calibrate before each seeding session or when switching seed types to account for wear, clogs, or changes in seed size.
Conclusion
Calibrating a broadcast spreader for clover seed is a straightforward process that ensures a healthy, vibrant lawn. By following the steps outlined—checking settings, performing test runs, and fine-tuning—you can achieve even seed distribution and avoid common pitfalls. Additionally, preparing the soil, seeding in optimal conditions, and maintaining your equipment will set your clover lawn up for success. With proper calibration and care, your clover lawn will thrive, offering a sustainable, low-maintenance alternative to traditional grass.