

Fishing looks peaceful from the outside. However, your first day with a new spinning reel can feel confusing. As the tackle specialists at CrazyFishingGear.com often warn, line twists, tangled spools, and backwards reel handles frustrate many beginners and ruin early trips. Therefore, some people give up before their first cast ever hits the water. The good news is that spinning reels are actually the most beginner-friendly tools in fishing. A correct setup prevents almost every common problem. In this post, you will learn how to spool your reel, attach it to the rod, set the drag, and tie your first lure the right way. Read on, because thirty minutes of careful setup makes your whole first season smoother.
Key Takeaways
- Spool line with the spool label facing up to prevent line twist.
- Match your line weight to both your rod and reel recommendations.
- Fill the spool to about one-eighth inch below the rim, no more.
- Set the drag to about a quarter of your line’s breaking strength.
- Learn the improved clinch knot first, because it handles most lures.
- Practice casting in a yard before your first trip to the water.
Gather Your Gear and Understand the Parts
Everything starts with the right equipment. Therefore, collect your gear before you begin. You need a spinning reel, a matching rod, fishing line, a lure or hook, and small scissors. A soft cloth and a friend also help during spooling.
First, make sure your rod and reel match. Every rod prints its recommended line weight near the handle. Additionally, every reel states its line capacity on the spool or box. Match those numbers, and the whole outfit fishes comfortably. Consequently, a five-pound line on a heavy rod casts poorly and fights worse.
Next, learn the basic parts, because every instruction ahead depends on them. A spinning reel has a handle, a spool that rotates during retrieval, a bail arm that flips open and closed, and a drag knob at the front or top. The bail is the metal hoop that guides line back onto the spool. Additionally, the drag is a tension system that lets fish pull line out instead of breaking it.
Line choice matters for beginners. Monofilament is the classic starter line. It is cheap, forgiving, and easy to handle. Additionally, it floats well for topwater lures. However, braided line casts farther and lasts longer, though it costs more and needs a knot trick. Fluorocarbon is nearly invisible underwater but stiff for new hands. Therefore, start with mono in eight to ten pound test for most freshwater fishing.
Finally, check your local rules before you fish. Most states and countries require a fishing license, and limits vary by water. According to the American Sportfishing Association, licensing also funds conservation programs that keep fisheries healthy. Consequently, a five-minute license purchase protects both your wallet and the fishery.
Spool the Line the Right Way
Spooling causes most beginner frustration. Line twist, loops, and tangles almost always come from rushing this one step. However, the correct method takes ten minutes and lasts all season.
- Open the bail arm by flipping it up.
- Run the line through the rod’s first guide, or tie directly to the spool.
- Tie an arbor knot around the reel spool and pull it snug.
- Close the bail arm by hand, gently.
- Hold the line spool label-up on the floor, so the line feeds off the same way the reel winds it.
- Reel slowly while a friend holds slight tension on the line with a cloth.
The label-up rule is the secret step. Line comes off a spool with a memory of its curl. Therefore, it must feed onto your reel in the same direction. If the line spirals into loops when you drop it, flip the spool over and start again. Consequently, this one habit prevents the twisted messes that ruin first trips.
Fill level matters too. An underfilled spool shortens your casting distance, because the line must peel off a smaller circle. However, an overfilled spool sheds loose loops during the cast. Therefore, stop at about one-eighth inch below the spool rim. Additionally, keep light tension during the entire fill so the line seats firmly.
Some anglers add backing to save money, but beginners should skip that trick for now. A full spool of mono is cheap enough. Additionally, wind the first thirty feet carefully, because that section takes the most abuse.
Finally, test your work. Close the bail, then pull line off the spool by hand. It should come off smoothly with light resistance. Additionally, flip the bail open and check that it locks firmly in the casting position. Therefore, a careful spooling now means months of clean casting later.
Attach the Reel, Set the Drag, and Rig Up
Now connect everything into a working fishing outfit. This part takes minutes, but each step has a right and wrong way.
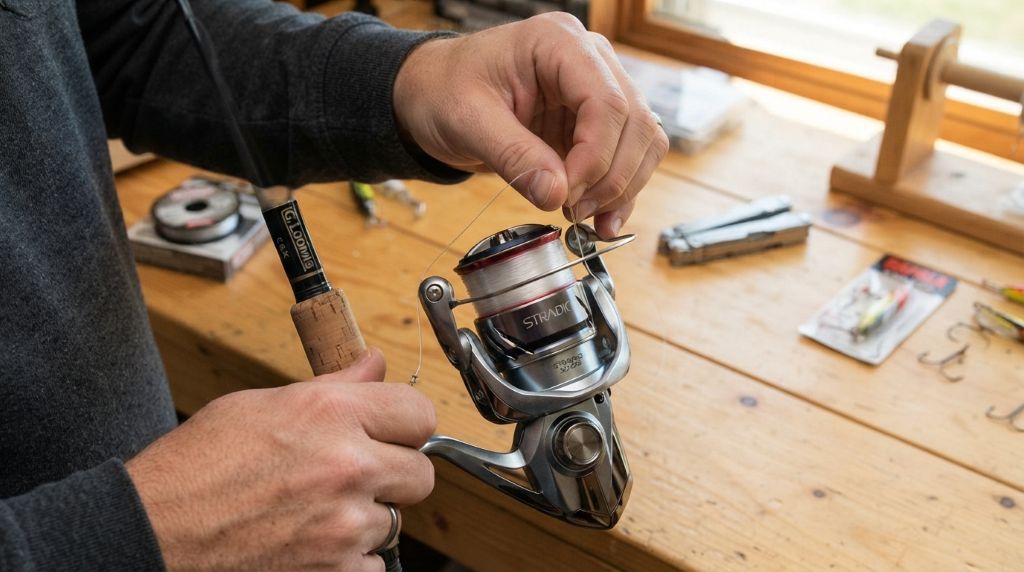
Start by attaching the reel to the rod. Slide the reel foot into the reel seat beneath the handle. Then twist the locking rings forward until they hold the reel firmly. Additionally, check for wobble by shaking the rod gently. A loose reel works itself free during the fight with a fish.
Next, set your drag before you ever tie a lure. The drag is a clutch that releases line under pressure. Set it by pulling line off the reel by hand, in front of the rod. Turn the drag knob until the line exits with a firm, smooth pull. As a rule, set the drag to roughly a quarter of your line’s breaking strength. Therefore, ten pound test gets about two and a half pounds of pull. Consequently, a hard-running fish takes line instead of snapping it.
Now rig your line through the rod. Thread the line through each guide from bottom to top, then through the tip. Then tie on your lure or rig. The improved clinch knot is the first knot every angler should learn:
- Pass the line through the lure eye and double it back.
- Wrap the tag end around the main line five or six times.
- Pass the tag end back through the small loop near the eye.
- Then pass it through the big loop you just formed.
- Moisten the line and pull the knot tight, then trim the tag end.
Test every knot by pulling hard before you cast. A knot that slips at home will fail at the water’s edge. Additionally, re-tie after every snag or caught fish, because line damage hides in the last few feet.
Finally, match your lure to your target. Small spinners and soft plastics suit almost all beginners. Additionally, add a bobber and hook with bait for the easiest first catches. Therefore, you give yourself the highest chance of feeling a bite on day one.
Practice Casting and Your First Trip Checklist
Casting looks effortless when done well. However, the motion takes a few practice sessions to feel natural. Therefore, practice in a yard with a small weight instead of a hook.
The basic cast follows this sequence. Hold the rod with your writing hand and the line against the handle with one finger. Open the bail and keep the line trapped by your finger. Then sweep the rod back and snap it forward, releasing your finger at about the forty-five degree point. The lure pulls line off the spool in an arc. Consequently, the cast works with the reel, not against it.
Practice the release timing first, because that is where beginners struggle. Release too early and the lure flies straight up. However, release too late and it crashes at your feet. Additionally, use your wrist more than your whole arm. After twenty casts, the motion becomes automatic.
Here is a checklist for your first real trip:
- A charged phone and a printed copy of local regulations.
- Your license, signed if required.
- Pliers and scissors for hooks and line.
- A small tackle box with a few proven lures or rigs.
- Snacks, water, and sun protection.
- Sunglasses for eye safety, because hooks reflect sunlight and cast far.
Safety deserves one special note. Never cast without looking behind you, and wear glasses to protect your eyes from swinging hooks. Additionally, handle fish with wet hands to protect their slime coat if you plan to release them. According to state fish and wildlife agencies, careful catch-and-release handling keeps fish alive after the fight. Consequently, good habits protect both you and the fishery.
Finally, clean your reel after every trip. Wipe it down, loosen the drag slightly for storage, and rinse the rod with fresh water after saltwater use. Therefore, your first reel lasts for years instead of one season.
Conclusion
A spinning reel is the best possible first tool for fishing. If you’re still deciding which fishing rod and reel combo is best for beginners, choosing a simple spinning setup can make the learning process much easier. You now know how to spool line without twist, attach the reel properly, set a working drag, and tie a reliable knot. Additionally, you have a casting sequence and a first-trip checklist to build on.
Therefore, start this weekend. Buy the outfit, spool the line carefully, and practice twenty casts in your yard. Then get your license and pick a calm local pond. Fishing rewards preparation with tight lines and quiet mornings, so set up your reel and make that first cast.
FAQs
What line should a beginner put on a spinning reel?
Monofilament in eight to ten pound test suits most beginners. It is cheap, forgiving, and tangles less than braid. Additionally, it works for nearly all freshwater fish.
Why does my line keep twisting?
You likely spooled it against its natural curl, or you reeled while the bail was open. Therefore, respool with the label facing up. Additionally, always close the bail by hand before reeling.
How tight should my drag be?
Set it to about a quarter of your line’s breaking strength. Therefore, ten pound test gets roughly two and a half pounds of pull. Additionally, loosen it when fighting bigger fish.
How full should I spool my spinning reel?
Fill to about one-eighth inch below the spool rim. Overfilling causes loose loops and tangles during casts. However, underfilling shortens your casting distance.
Can I use a spinning reel on any rod?
No, use it only on a spinning rod, which has the guides on the underside. Casting rods mount the reel on top and suit baitcast reels. Therefore, match the rod type to the reel before buying.


