

Mistakes in surf photography combines adventure, skill, and patience. Whether you’re on the beach or in the water, shooting surfers in action is one of the most exciting challenges in photography. However, beginners often run into the same problems—missed shots, blurry action, or just bad timing.
When I first picked up my camera to shoot the waves, I had no idea what I was getting into. I made every mistake in the book—wrong lens, bad timing, poor light settings. It was frustrating at first, but every mistake helped me get better.
That’s why I’m sharing what I’ve learned, so you don’t have to make the same rookie errors. With the right techniques and some practice, your photos will go from “meh” to magazine-worthy.
If you’re dreaming of combining travel, waves, and stunning photos, take a moment to explore The Surfing Village. It’s a goldmine for surf lovers looking to improve both their ride and their photo game.
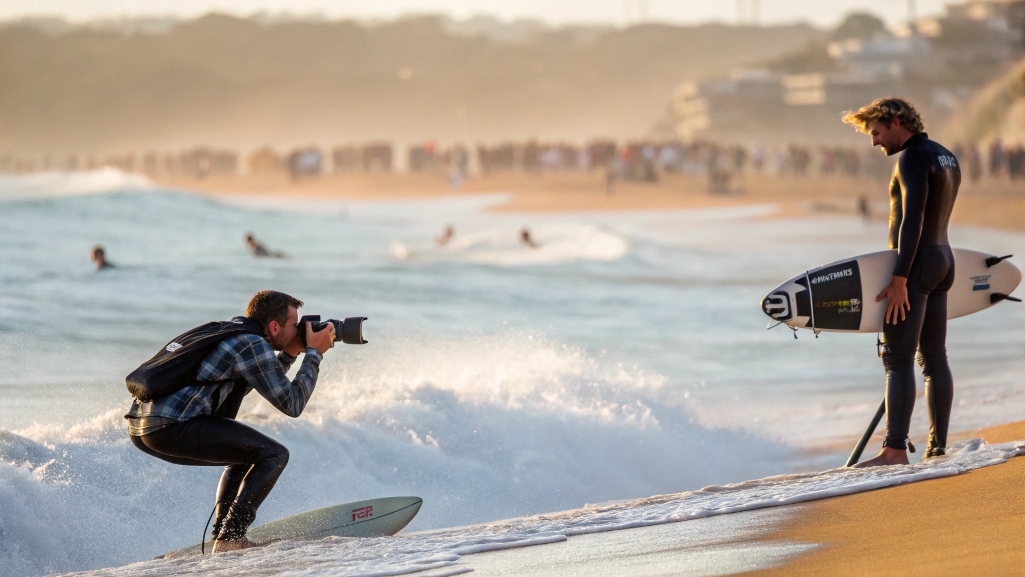
Not Using the Right Gear for Surf Photography
Choosing the wrong camera gear is a mistake many beginners make. Surf photography requires fast autofocus, a good zoom lens, and weather-sealed bodies if you’re going near the water.
Here’s what beginners often get wrong:
- Using kit lenses: These are slow and won’t catch fast action.
- No water housing: Shooting from the water without proper housing risks your camera.
- Low zoom range: Surf happens far out. You’ll need a 200mm+ lens to get close shots.
Tip: If you’re shooting from the shore, start with a 70-200mm or 100-400mm lens. Canon and Sony both make excellent options in this range. For water photography, invest in a waterproof housing like SPL or AquaTech.
Additionally, always use a surfboard bag travel when bringing your gear on surf trips. It protects your board and leaves more space for your photography tools.
According to Photography Life, lens quality impacts image sharpness more than megapixel count. So prioritize a solid lens over the latest camera body.
Shooting at the Wrong Time of Day
Lighting is everything in photography, especially with surf shots. Many beginners shoot in harsh midday sun, creating blown-out highlights and dark shadows.
Instead, focus on the golden hour—one hour after sunrise or before sunset.
Why Golden Hour Works:
- The sun is lower, creating soft shadows.
- The light has a golden tone, which flatters water and skin tones.
- You can capture backlit sprays, glowing waves, and beautiful reflections.
Pro Tip: Check the tide charts and pair them with the golden hour. A good wave with soft light is the perfect combo.
The National Oceanic and Atmospheric Administration (NOAA) offers accurate tide forecasts to help plan your shoot around wave height and light direction.
Not Knowing Your Subject: Surf Culture and Timing
Understanding surf culture helps you anticipate your subject’s moves. Many beginners just fire away, hoping to catch the moment. But surf photography is about predicting action.
Here’s what helps:
- Learn wave behavior: Know when the wave will barrel, when the surfer will drop in, and when the spray will fly.
- Watch before you shoot: Spend 10–15 minutes watching the surf. Who’s catching the most waves? Where are the best breaks?
- Talk to surfers: They’ll tell you where the next big set is coming from or if a swell is building.
I remember shooting my friend Ben at Bali’s Uluwatu. I missed three of his best rides just because I was out of sync with the waves. After talking to him and watching the lineup, I was able to nail the timing and get a photo he still uses on his Instagram today.
Not Using Fast Enough Shutter Speeds
Blurred shots are a common rookie mistake. Surfers move fast, and so should your shutter.
The Fix:
- Use shutter speeds of 1/1000 sec or faster to freeze motion.
- If you’re shooting in low light, boost your ISO.
- Use aperture priority mode and let the camera pick the best shutter speed.
Modern cameras like the Canon R6 or Sony A7IV handle high ISO with less noise, so don’t fear bumping it up to 1600 or even 3200 if needed.
According to DPReview, motion blur is the #1 complaint in beginner surf galleries. So if your images are fuzzy, the shutter is likely too slow.
Ignoring the Background and Composition
Yes, the surfer is the star. But the background matters just as much. A messy horizon or crowded lineup can ruin an otherwise great shot.
Tips for Better Composition:
- Use the rule of thirds. Place the surfer off-center for a dynamic image.
- Avoid buildings, crowds, or boats in the background.
- Look for clean wave lines, dramatic cliffs, or golden skies.
I once framed a surfer against a sunlit cliff at dawn—pure luck, but it taught me that background makes the moment.
Additionally, crop with care. Don’t cut off surfboards, spray, or limbs. Give the subject room to move through the frame.
Not Editing Photos Properly
Shooting is only half the job. Editing polishes your photos and makes them pop.
However, many beginners over-edit—boosting colors too much, crushing shadows, or adding unnecessary filters.
What to Focus On:
- Fix exposure and contrast.
- Adjust white balance to match real colors.
- Sharpen slightly to bring out details.
Adobe Lightroom is the most popular tool among surf photographers for a reason. It’s simple and powerful. If you’re just starting, try free mobile apps like Snapseed or VSCO.
According to Statista, over 65% of professional photographers use Lightroom in their daily workflow.
Being Unprepared for the Environment
The ocean is unpredictable. Saltwater, sand, wind, and sun can all damage your gear if you’re not prepared.
Here’s What to Pack:
- Waterproof bag for your camera.
- Microfiber cloth to clean lenses.
- Shade or umbrella for beach shoots.
- Extra batteries and memory cards.
- Sunscreen and water for yourself.
In my early days, I lost a whole morning of shots because my battery died. Now I carry two spares, always charged.
Protecting your gear is key to keeping your images (and budget) safe.
Not Telling a Story With Your Shots
Great surf photos don’t just show action—they tell a story. A surfer walking with their board, paddling out, sitting in the lineup, or high-fiving a friend can bring depth to your work.
Think Beyond the Action Shot:
- Capture before and after moments.
- Include environmental shots—sunsets, shorelines, wave textures.
- Shoot wide, medium, and close-up to build a full narrative.
Creating a photo story keeps your audience engaged. Instagram posts with multiple frames tend to perform better than single shots.
Being Impatient or Quitting Too Soon
Surf photography takes time. You may wait an hour for the perfect wave or shoot for days before getting “the shot.”
Stick With It:
- Use downtime to learn. Try new angles or practice panning.
- Be ready to shoot at all times. Sometimes, magic happens unexpectedly.
- Review your photos on the spot and learn from mistakes.
I once spent six hours on the beach with only one keeper image. But that image later got published in a local surf mag. It was worth the wait.
Patience pays off, especially when the ocean is your studio.
Forgetting to Practice Regularly
Like surfing, photography is a skill that improves with repetition.
Make It a Habit:
- Join a local surf group and shoot their sessions.
- Set weekly goals (e.g., perfect one angle or improve one edit).
- Get feedback from online forums or mentors.
According to Psychology Today, skill improvement is tied directly to frequent practice and feedback. The more you shoot, the faster you’ll grow.
Read More Also: How to Fix Salty Hair After Surfing: Easy, Real Solutions That Work
FAQs
What camera should I use for surf photography?
Start with a DSLR or mirrorless camera that has fast autofocus. Canon, Nikon, and Sony all have great options.
Can I take surf photos with my phone?
Yes, from the beach during good light. However, you’ll need zoom and stability tools for better quality.
Do I need a water housing to shoot surfing?
Only if you plan to get in the water. For land-based shots, a long zoom lens is enough.
What is the best time to take surf photos?
Early morning and late afternoon offer soft, golden light and clean waves—ideal for beautiful photos.
How can I protect my camera at the beach?
Use weather-sealed gear, protective bags, and always clean off salt and sand after shooting.
Read More Also: Discovering the Perfect Homes by Serene Waterfronts
Conclusion
Every surf photographer starts as a beginner. Making mistakes is part of the journey, but learning from them will level up your skills fast.
Stay curious. Keep experimenting. Talk to surfers. Understand the ocean. And most importantly, keep clicking.
Before you head out, explore surf travel tips, gear reviews, and photo inspiration. Whether you’re headed to Indo, Hawaii, or your local break, you’ll find everything you need to level up.
Got a surf shot you’re proud of? Share it in the comments—or tell us your biggest photography fail. We’d love to hear your story.


