

Creating beautiful cloud swirl textures on your walls can transform any room into a stunning visual masterpiece. This technique offers a unique way to add depth and character to your living spaces without breaking the bank. Many homeowners and DIY enthusiasts are discovering this affordable method through resources like South East on Rent, where creative home improvement ideas come to life.
Joint compound, also known as drywall mud, serves as the perfect medium for creating these ethereal patterns. The material is easy to work with, forgiving for beginners, and produces professional-looking results. Additionally, this method costs significantly less than hiring professional painters or purchasing expensive wallpaper.
The beauty of texture painting with joint compound lies in its versatility and simplicity. You can create soft, flowing cloud patterns that mimic natural sky formations or bold, dramatic swirls that make a statement. Therefore, this technique works perfectly in bedrooms, living rooms, or even accent walls throughout your home.
Materials You Will Need
Before starting your project, gather all necessary supplies. You will need all-purpose joint compound, which you can find at any hardware store. A large mixing bucket helps keep your compound at the right consistency throughout the project.
For application tools, purchase a wide taping knife or drywall knife. A 6-inch or 8-inch blade works best for creating smooth, flowing patterns. You will also need a smaller knife for detail work and corners.
Other essential materials include drop cloths to protect your floors, painter’s tape for clean edges, and sandpaper for final touches. Keep a spray bottle filled with water nearby to help blend your swirls. Finally, primer and paint in your chosen colors complete your supply list.
Preparing Your Wall Surface
Proper preparation ensures your cloud swirl texture adheres correctly and lasts for years. Start by cleaning your walls thoroughly with a damp cloth to remove dust, dirt, and grease. Any residue can prevent the joint compound from sticking properly.
Next, inspect your walls for damage. Fill any holes or cracks with spackling paste and allow them to dry completely. Sand these areas smooth so they blend seamlessly with the surrounding surface.
Apply painter’s tape along baseboards, ceiling edges, and around door frames. This creates clean lines and protects areas you do not want textured. Lay down drop cloths to catch any falling compound. According to The Spruce, proper wall preparation accounts for 80 percent of a successful paint job.
Prime your walls if they are new drywall or have not been painted recently. Primer helps the joint compound adhere better and creates a uniform surface. Allow the primer to dry completely before moving forward.
Mixing Your Joint Compound
The consistency of your joint compound determines how well it spreads and holds its texture. Open your bucket of all-purpose joint compound and stir it thoroughly. The compound should resemble thick pancake batter or yogurt.
If the compound seems too thick, add small amounts of water and mix well. However, avoid making it too thin, as runny compound will not hold the swirl patterns. You want a consistency that spreads easily but maintains its shape.
Mix the compound for several minutes to eliminate lumps. Smooth, lump-free compound creates better textures and is easier to work with. Keep your mixing tools clean throughout the process.
Creating the Base Layer
Apply a thin base coat of joint compound across your wall. Use your wide taping knife to spread the compound in smooth, even strokes. This layer does not need to be perfect since you will add texture on top.
Work in sections approximately three feet by three feet. This manageable size prevents the compound from drying before you create your swirl patterns. Additionally, smaller sections give you better control over the final appearance.
The base layer should be about one-eighth inch thick. Spread it evenly without leaving heavy ridges or valleys. This foundation supports the decorative swirls you will add next.
Forming Cloud Swirl Patterns
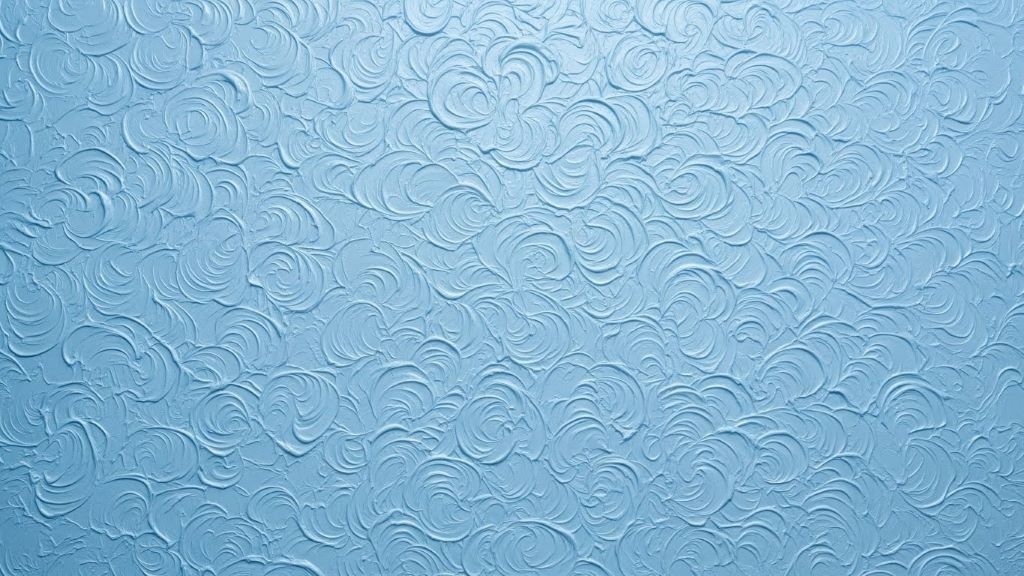
Now comes the creative part where your vision takes shape. While the base layer remains wet, use your taping knife to create swirling motions. Hold the knife at a slight angle and make curved, flowing movements across the surface.
Think about how clouds move naturally across the sky. Create soft, organic shapes rather than rigid patterns. Overlap your swirls slightly to build depth and dimension.
Vary the pressure as you work. Lighter pressure creates subtle texture, while firmer pressure produces more dramatic effects. Therefore, you can customize the intensity throughout your wall for visual interest.
For a more realistic cloud effect, make some swirls larger and others smaller. Natural clouds come in various sizes and shapes. This variation makes your wall look more authentic and less manufactured.
Blending and Softening Edges
After creating your swirl patterns, blend the edges for a seamless look. Lightly spray water onto the textured surface using your spray bottle. The moisture helps soften harsh lines and creates smoother transitions.
Use a clean, damp taping knife to gently smooth rough edges. Work carefully to maintain your swirl patterns while eliminating obvious tool marks. This step requires a delicate touch and patience.
Step back periodically to view your work from different angles. This perspective helps you identify areas that need more blending or additional texture. Make adjustments while the compound remains workable.
Drying and Curing Time
Allow your textured wall to dry completely before proceeding to the next steps. Drying time varies depending on humidity, temperature, and compound thickness. Generally, joint compound takes 24 to 48 hours to dry fully.
The compound changes from dark gray to white as it dries. Do not rush this process, as wet compound underneath can cause problems later. Good ventilation speeds up drying time significantly.
Avoid touching the wall during the drying period. Even light contact can damage your carefully created patterns. Therefore, keep pets and children away from the freshly textured surface.
Sanding and Smoothing
Once completely dry, lightly sand your textured wall to remove any sharp edges or imperfections. Use fine-grit sandpaper, around 120 to 150 grit, for best results. Sand gently to avoid flattening your swirl patterns.
Focus on areas where the compound appears too thick or uneven. The goal is not to eliminate texture but to refine it. Wear a dust mask during this process, as sanding creates fine particles.
Wipe down the wall with a slightly damp cloth after sanding. This removes dust and prepares the surface for painting. Allow the wall to dry completely before applying primer or paint.
Painting Your Cloud Texture
Painting brings your cloud swirl texture to life with color and dimension. Apply a coat of primer first if you plan to use light colors. Primer ensures even paint coverage and prevents the joint compound from absorbing too much paint.
Choose paint colors that enhance your cloud effect. Soft blues, whites, and grays work beautifully for sky-inspired designs. However, you can use any colors that match your decor preferences.
Apply paint with a roller for even coverage across textured surfaces. Work the roller into the valleys and peaks of your swirls. You may need two coats for complete coverage, especially with lighter colors.
For added depth, consider using multiple paint colors. Apply a base color first, then lightly dry-brush a second shade over the raised portions of your texture. This technique creates stunning dimensional effects that highlight your swirl patterns.
Maintenance and Care
Your cloud swirl textured wall requires minimal maintenance once complete. Dust the surface occasionally with a soft, dry cloth or duster. The texture can trap dust over time, so regular cleaning keeps it looking fresh.
For stubborn marks or stains, gently wipe with a damp cloth. Avoid harsh scrubbing, which can damage the textured surface. Most dirt comes off easily with light pressure.
If damage occurs, you can repair small areas by applying fresh joint compound and recreating the swirl pattern. Match the technique you used originally for seamless repairs. Touch up paint ensures the repaired area blends perfectly.
Creative Variations and Ideas
Experiment with different swirl sizes and directions for unique effects. Create tighter, more concentrated swirls for a dramatic look. Alternatively, make loose, flowing patterns for a gentler appearance.
Try combining cloud swirls with other techniques. Add some straight-edged sections or geometric patterns for modern contrast. Mix textures within the same room for an eclectic, artistic vibe.
Consider creating an accent wall rather than texturing an entire room. One textured wall becomes a focal point that draws attention without overwhelming the space. This approach also reduces the time and materials needed for your project.
Common Mistakes to Avoid
Many beginners make the compound too thin, causing it to drip and lose texture. Remember that thicker consistency holds patterns better. However, do not make it so thick that spreading becomes difficult.
Another common error involves working too slowly. Joint compound begins drying within 20 to 30 minutes, depending on conditions. Work efficiently to complete each section while the compound remains workable.
Avoid overworking your patterns. Too much manipulation can flatten your swirls and eliminate texture. Create your design decisively, then move to the next section. Trust your instincts and avoid excessive tweaking.
Conclusion
Creating cloud swirl textures with joint compound offers an affordable, creative way to enhance your home’s interior. This technique requires basic materials, simple tools, and patience to master. The process involves proper wall preparation, careful compound application, artistic swirl creation, and thoughtful painting.
Your finished wall will showcase unique, personalized artwork that reflects your style and creativity. The technique works beautifully in various rooms and complements many design aesthetics. Furthermore, the skills you develop during this project apply to other home improvement endeavors.
Whether you create soft, subtle clouds or bold, dramatic swirls, this method transforms ordinary walls into extraordinary features. With practice, you will develop your own signature style and techniques that make each project uniquely yours.
Frequently Asked Questions
Can I create cloud swirl texture over existing paint?
Yes, you can apply joint compound over painted walls. However, the surface must be clean, dry, and free from glossy finishes. Lightly sand glossy paint and apply primer before texturing for best adhesion.
How much joint compound do I need for one wall?
A standard wall measuring 10 feet by 8 feet typically requires one 5-gallon bucket of joint compound. The exact amount depends on how thick you apply the compound and how heavily you texture the surface.
Can I use pre-mixed or powder joint compound?
Pre-mixed all-purpose joint compound works best for this project. It has the right consistency and is ready to use immediately. Powder compound requires mixing and can be more difficult for beginners to get the right consistency.
What if I make a mistake while creating the swirls?
Simply smooth out the area with your taping knife and recreate the pattern while the compound remains wet. Joint compound is very forgiving, allowing you to fix mistakes easily before it dries completely.
How long will the textured finish last?
When properly applied and painted, cloud swirl texture can last for many years. The durability matches standard drywall finishes. Avoid hitting or scraping the wall to maintain the texture’s integrity over time.
Related Topics:
How Much Does a Home Remodel Really Cost? What to Expect
How to Effectively Raise Home’s Value with Smart Choices